Meduza v0.3 Demo
Project Background
Description
Meduza C2 is a modular, collaborative Command and Control framework developed using Golang (server), C# (agent), and ReactJS (client). The project has been in development for a relatively short time, initially aiming to rewrite an older C2 project created by ksel172 in C# and Blazor.
Features
The project consists of three main components and aims to implement the following features:
- Containerized and easy-to-deploy framework with extensive customizability
- Multiplayer command and control, allowing teams and roles for users
- Payload compilation using the .NET framework
- Dynamic module loading for agents, featuring dependency resolution and streamlined development with the ModuleBase NuGet package
- Support for multiple listener types, including external listener implementation
- External agent support
- Intuitive and easy to navigate user interface coded in ReactJS
- Built-in MITRE ATT&CK visualization, providing easy access to adversary tactics and techniques
- Multi-platform support, ensuring compatibility across different operating systems
- Encrypted communication using AES 256 bit with message integrity verification and TLS/SSL support
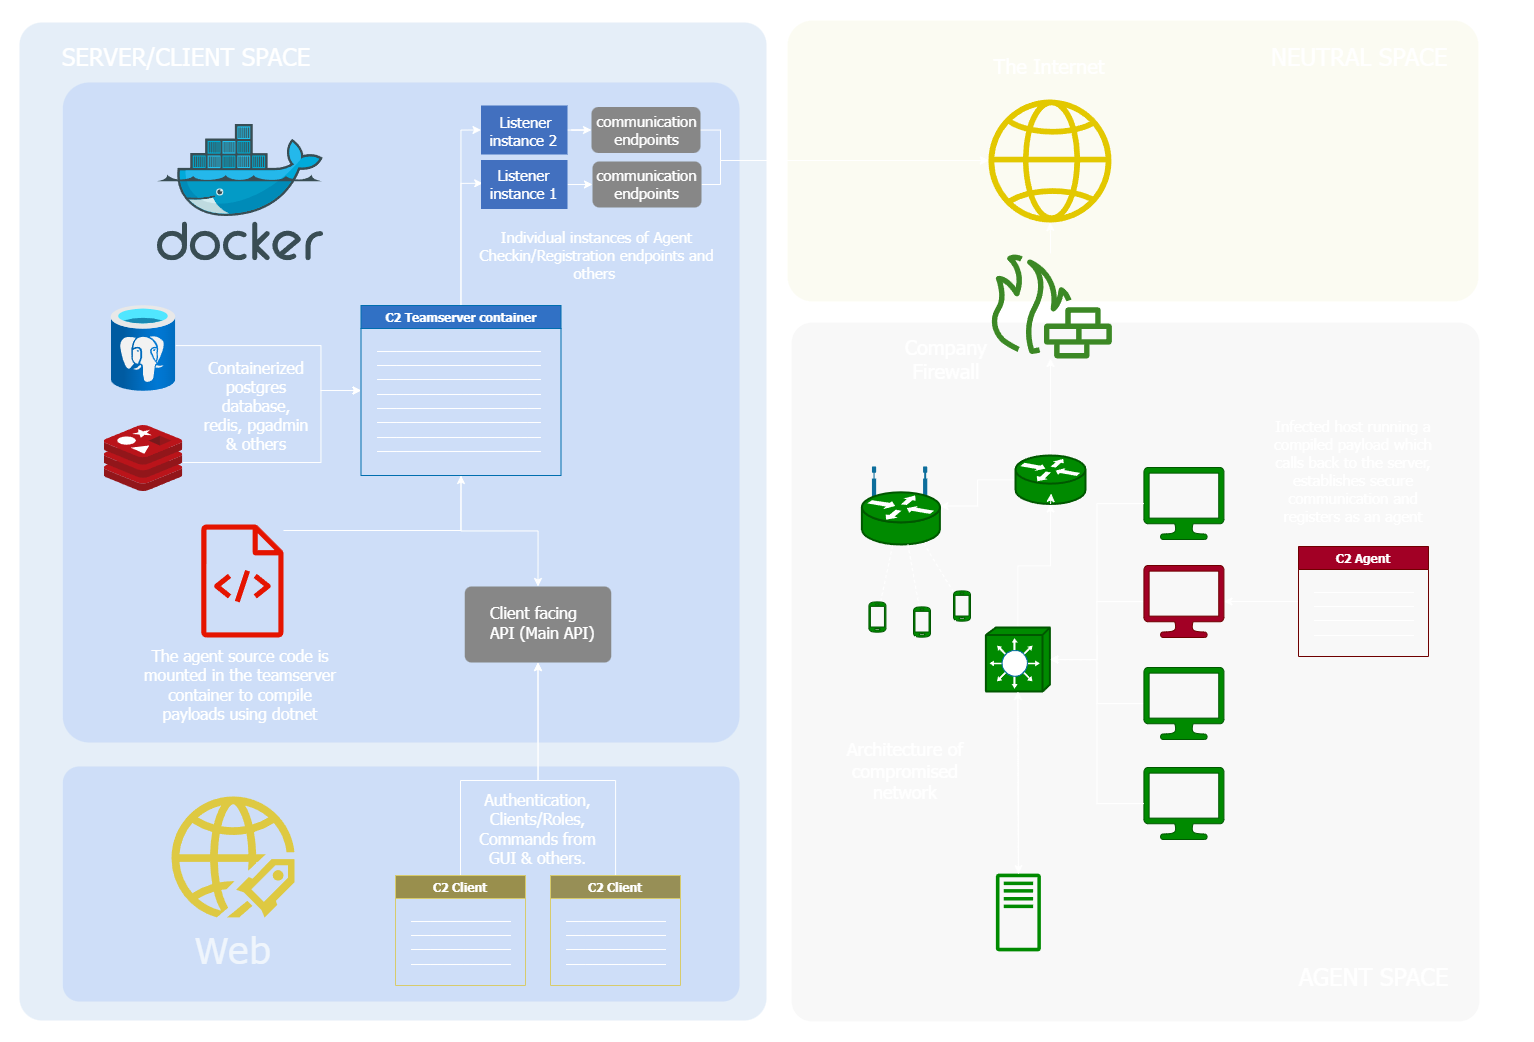
Architecture
Demo
Note: The functionality will be previewed using Postman to interact with the teamserver API, as the client-server communication is not fully implemented in this milestone (v0.3).
Startup
Requirements:
- Docker
- .NET 8 Runtime
- npm
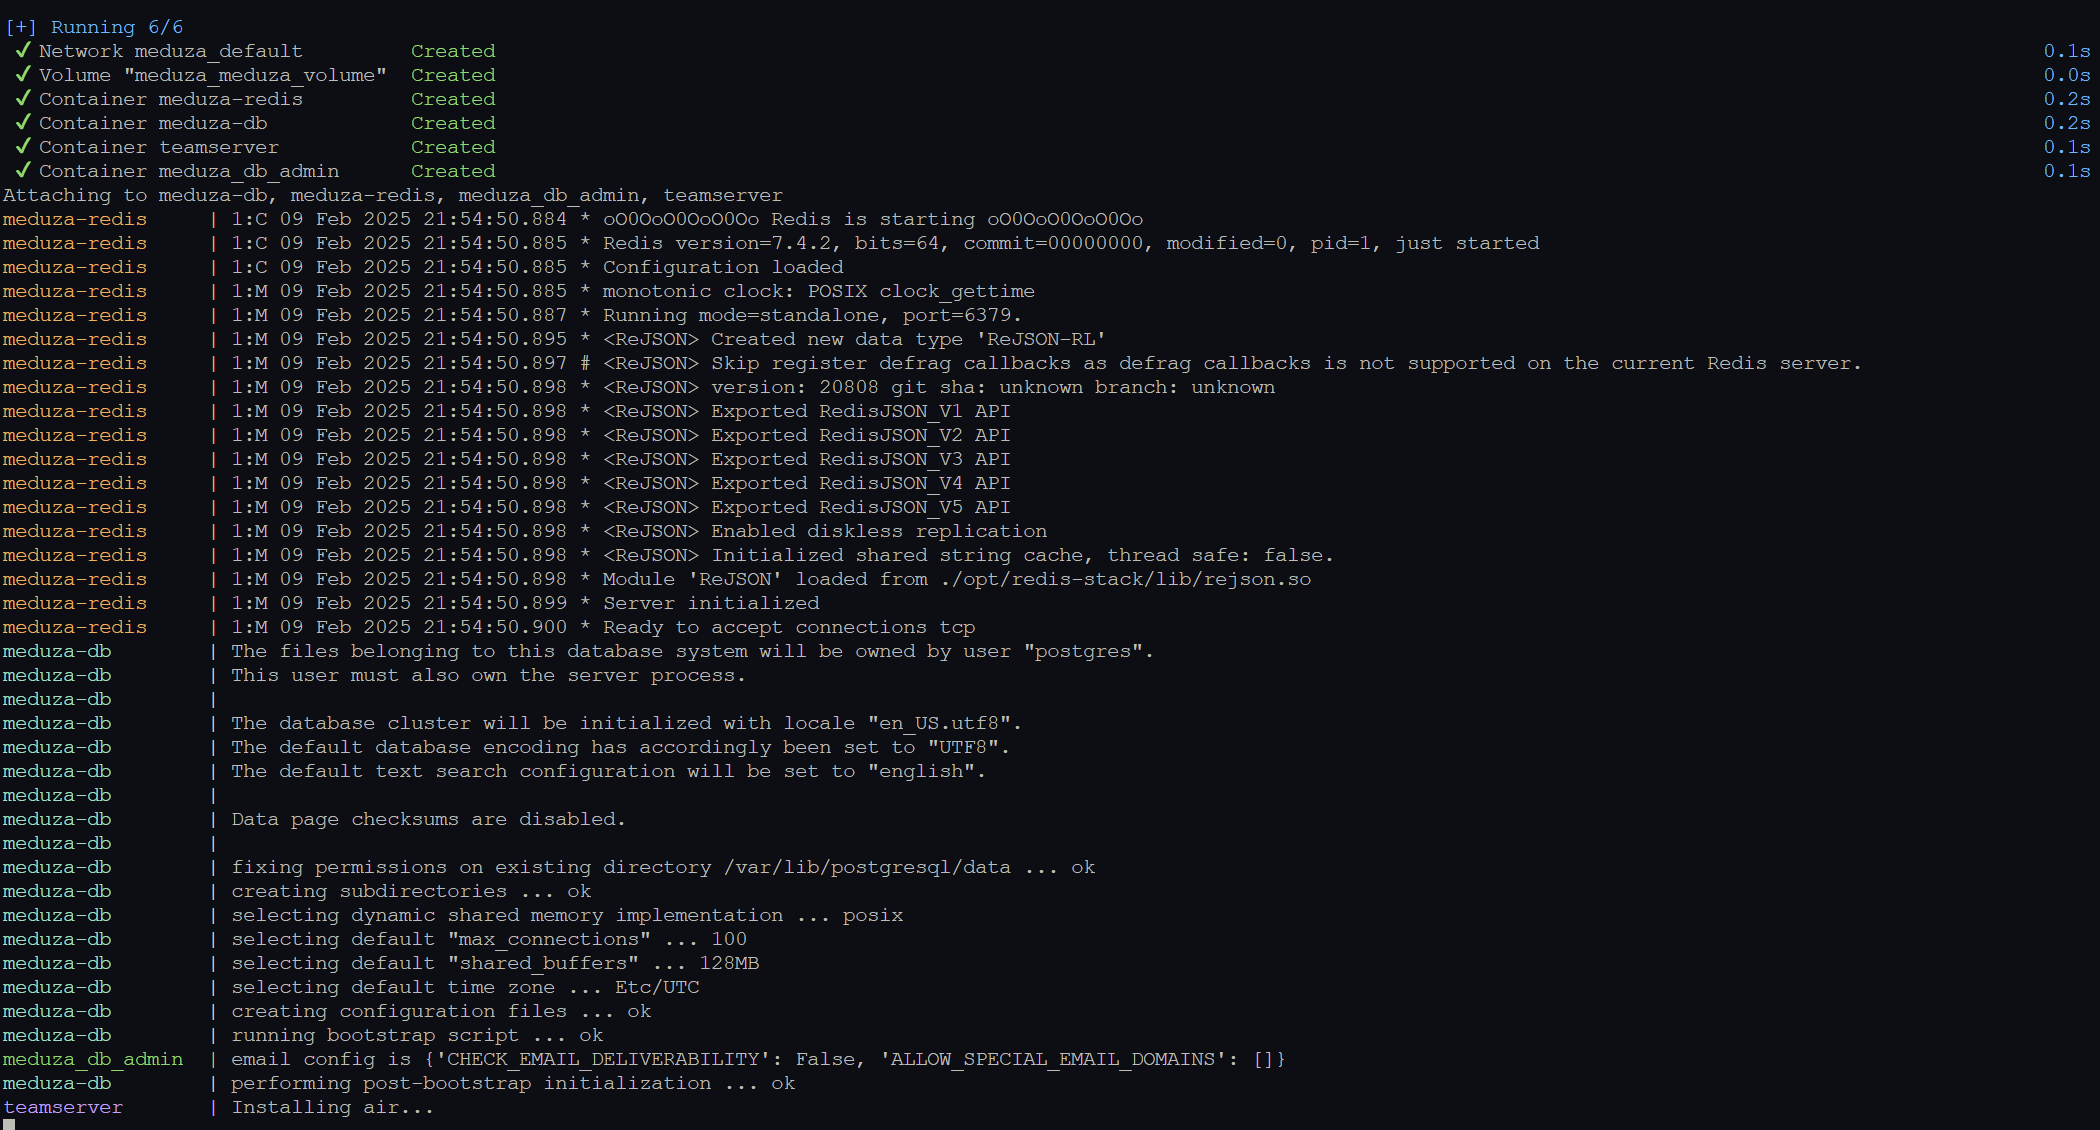
Starting the Server
The server’s Docker Compose configuration includes four containers and a volume:
- teamserver – Main server container
- postgres – Database
- redis – Used for caching and pub/sub functionality
- pgadmin – Database management interface
The server can be started using the following command, with a .env file containing the necessary configuration:
1
docker compose --env-file .env.dev up --force-recreate --build
Currently, the following arguments can be configured in the server .env file:
1
2
3
4
5
6
7
8
9
10
11
12
13
14
15
16
17
18
19
20
21
22
23
24
25
26
27
28
29
30
31
32
33
34
35
36
37
38
39
40
41
42
# teamserver conf
TEAMSERVER_HOSTNAME=teamserver
TEAMSERVER_PORT=8080

# Possible values: dev || debug
TEAMSERVER_MODE=dev

# golang debug
DLV_PORT=2345

# listener exposed port range
LISTENER_PORT_RANGE_START=8000
LISTENER_PORT_RANGE_END=8010

# postgres
POSTGRES_HOST=meduza-db
POSTGRES_PORT=5432
POSTGRES_NAME=postgres
POSTGRES_PASSWORD=postgres
POSTGRES_USER=postgres
POSTGRES_DB=meduza-db
POSTGRES_SCHEMA=meduza_schema

# redis
REDIS_HOST=meduza-redis
REDIS_PORT=6379
REDIS_PASSWORD=redis

# pgadmin
PGADMIN_DEFAULT_EMAIL=admin@meduza.dev
PGADMIN_DEFAULT_PASSWORD=10tacles

# jwt secret
JWT_SECRET=<some_secret>

# refresh token cookie
COOKIE_PATH=/
COOKIE_DOMAIN=localhost
REFRESH_SECURE=false
REFRESH_HTTP=true

MODULE_UPLOAD_PATH=./teamserver/modules
Starting the Client
Navigate to the client folder and run:
1
2
3
4
5
6
7
npm run dev
# or
yarn dev
# or
pnpm dev
# or
bun dev
Running an Agent
After a payload is compiled (as will be shown in Usage), the executable can be downloaded and transported to the target, or it can be used in combination with a loader to stage the payload. After it is executed, an agent is registered along with agent_info, agent_config (inheriting the payload_config), and agent_task.
Usage
Authenticating as a User
In the image below, I authenticate as the default admin user Meduza:Meduza and obtain the auth token, which I set across my Postman requests as the Bearer. 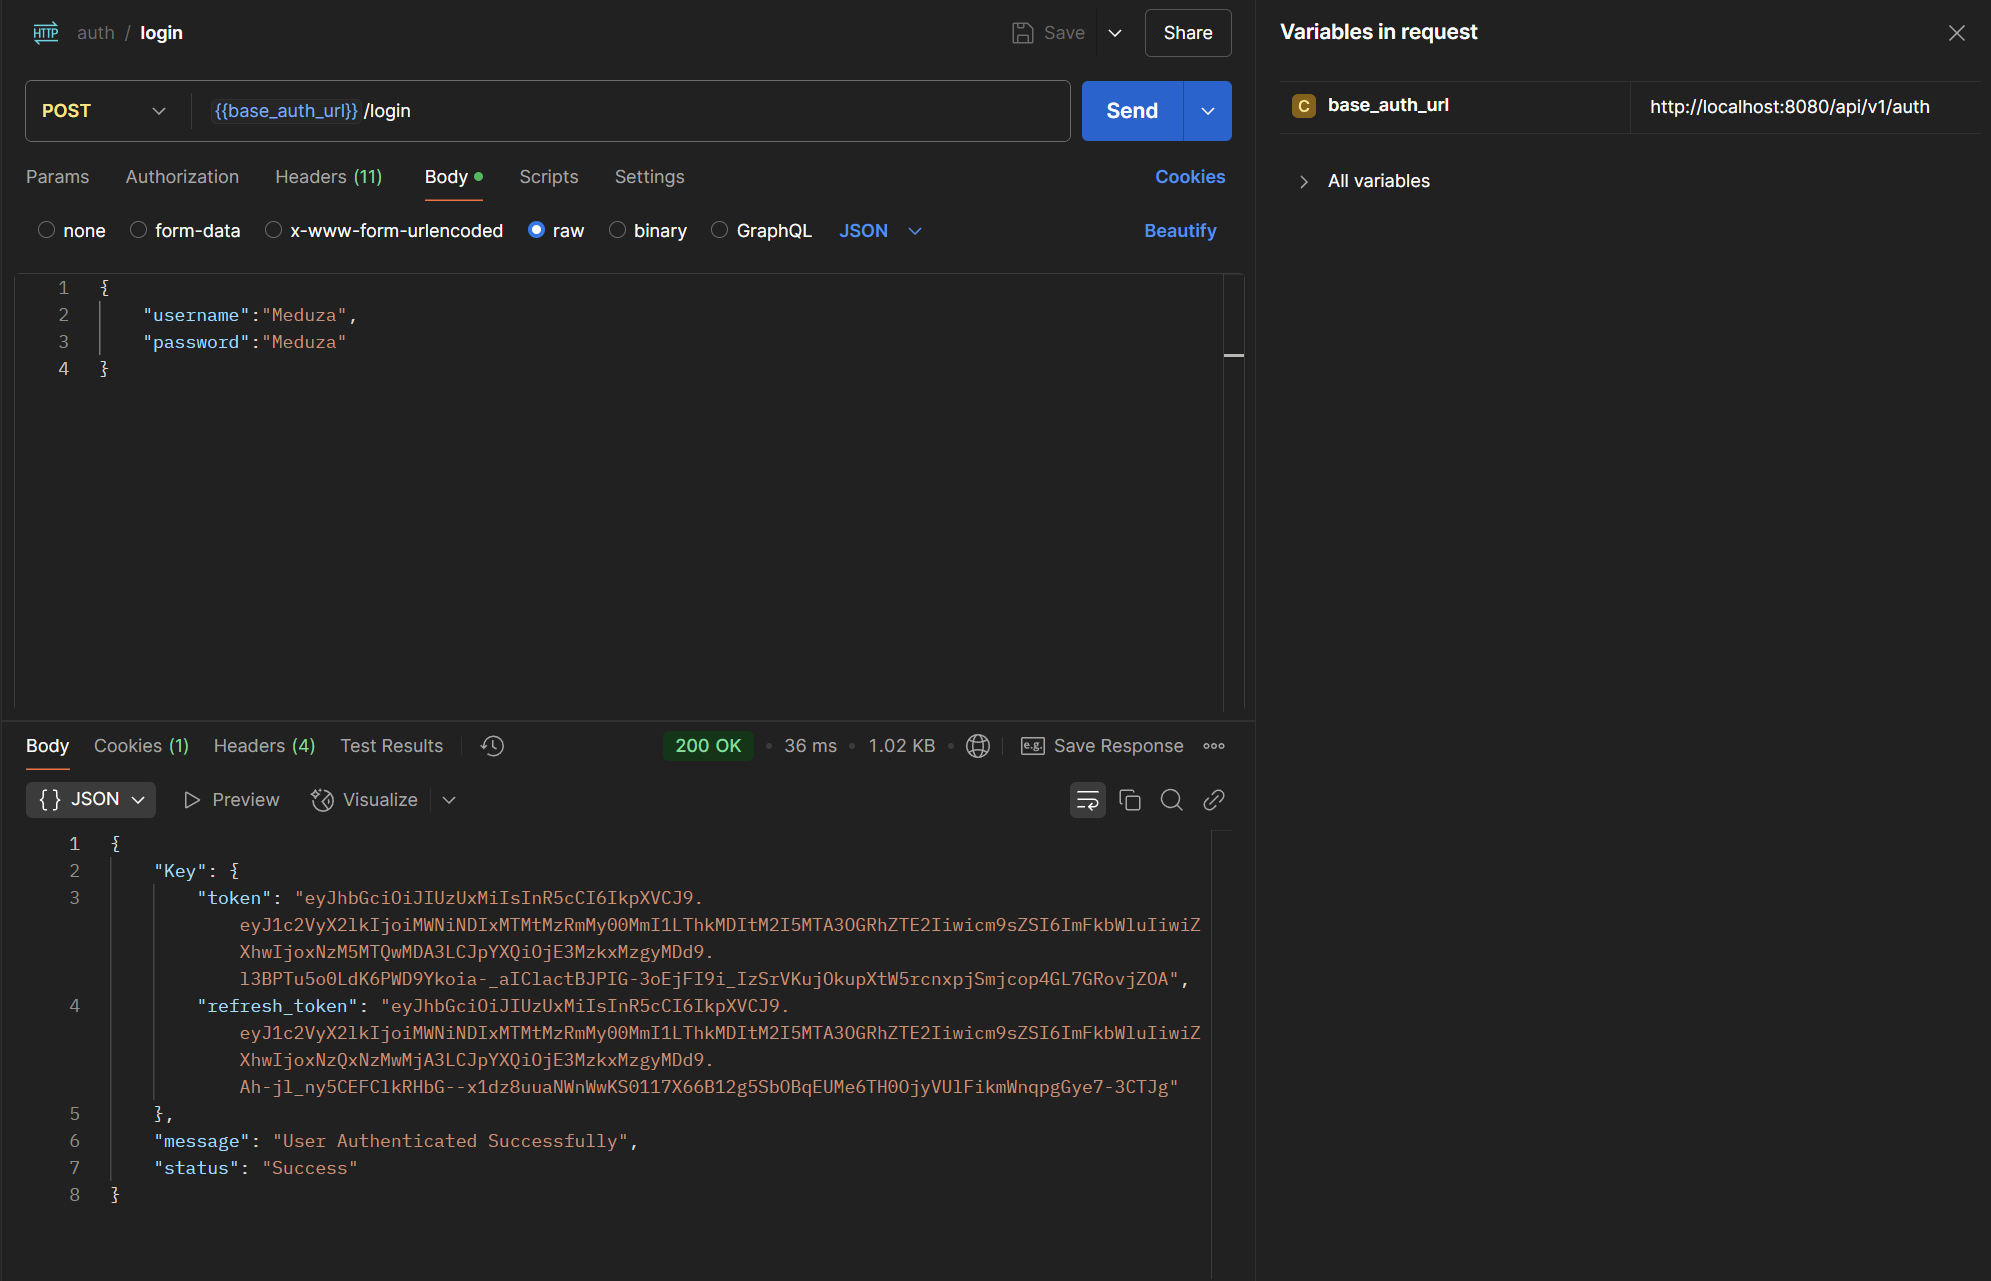
The user interface (already functional sign-in during v0.3): 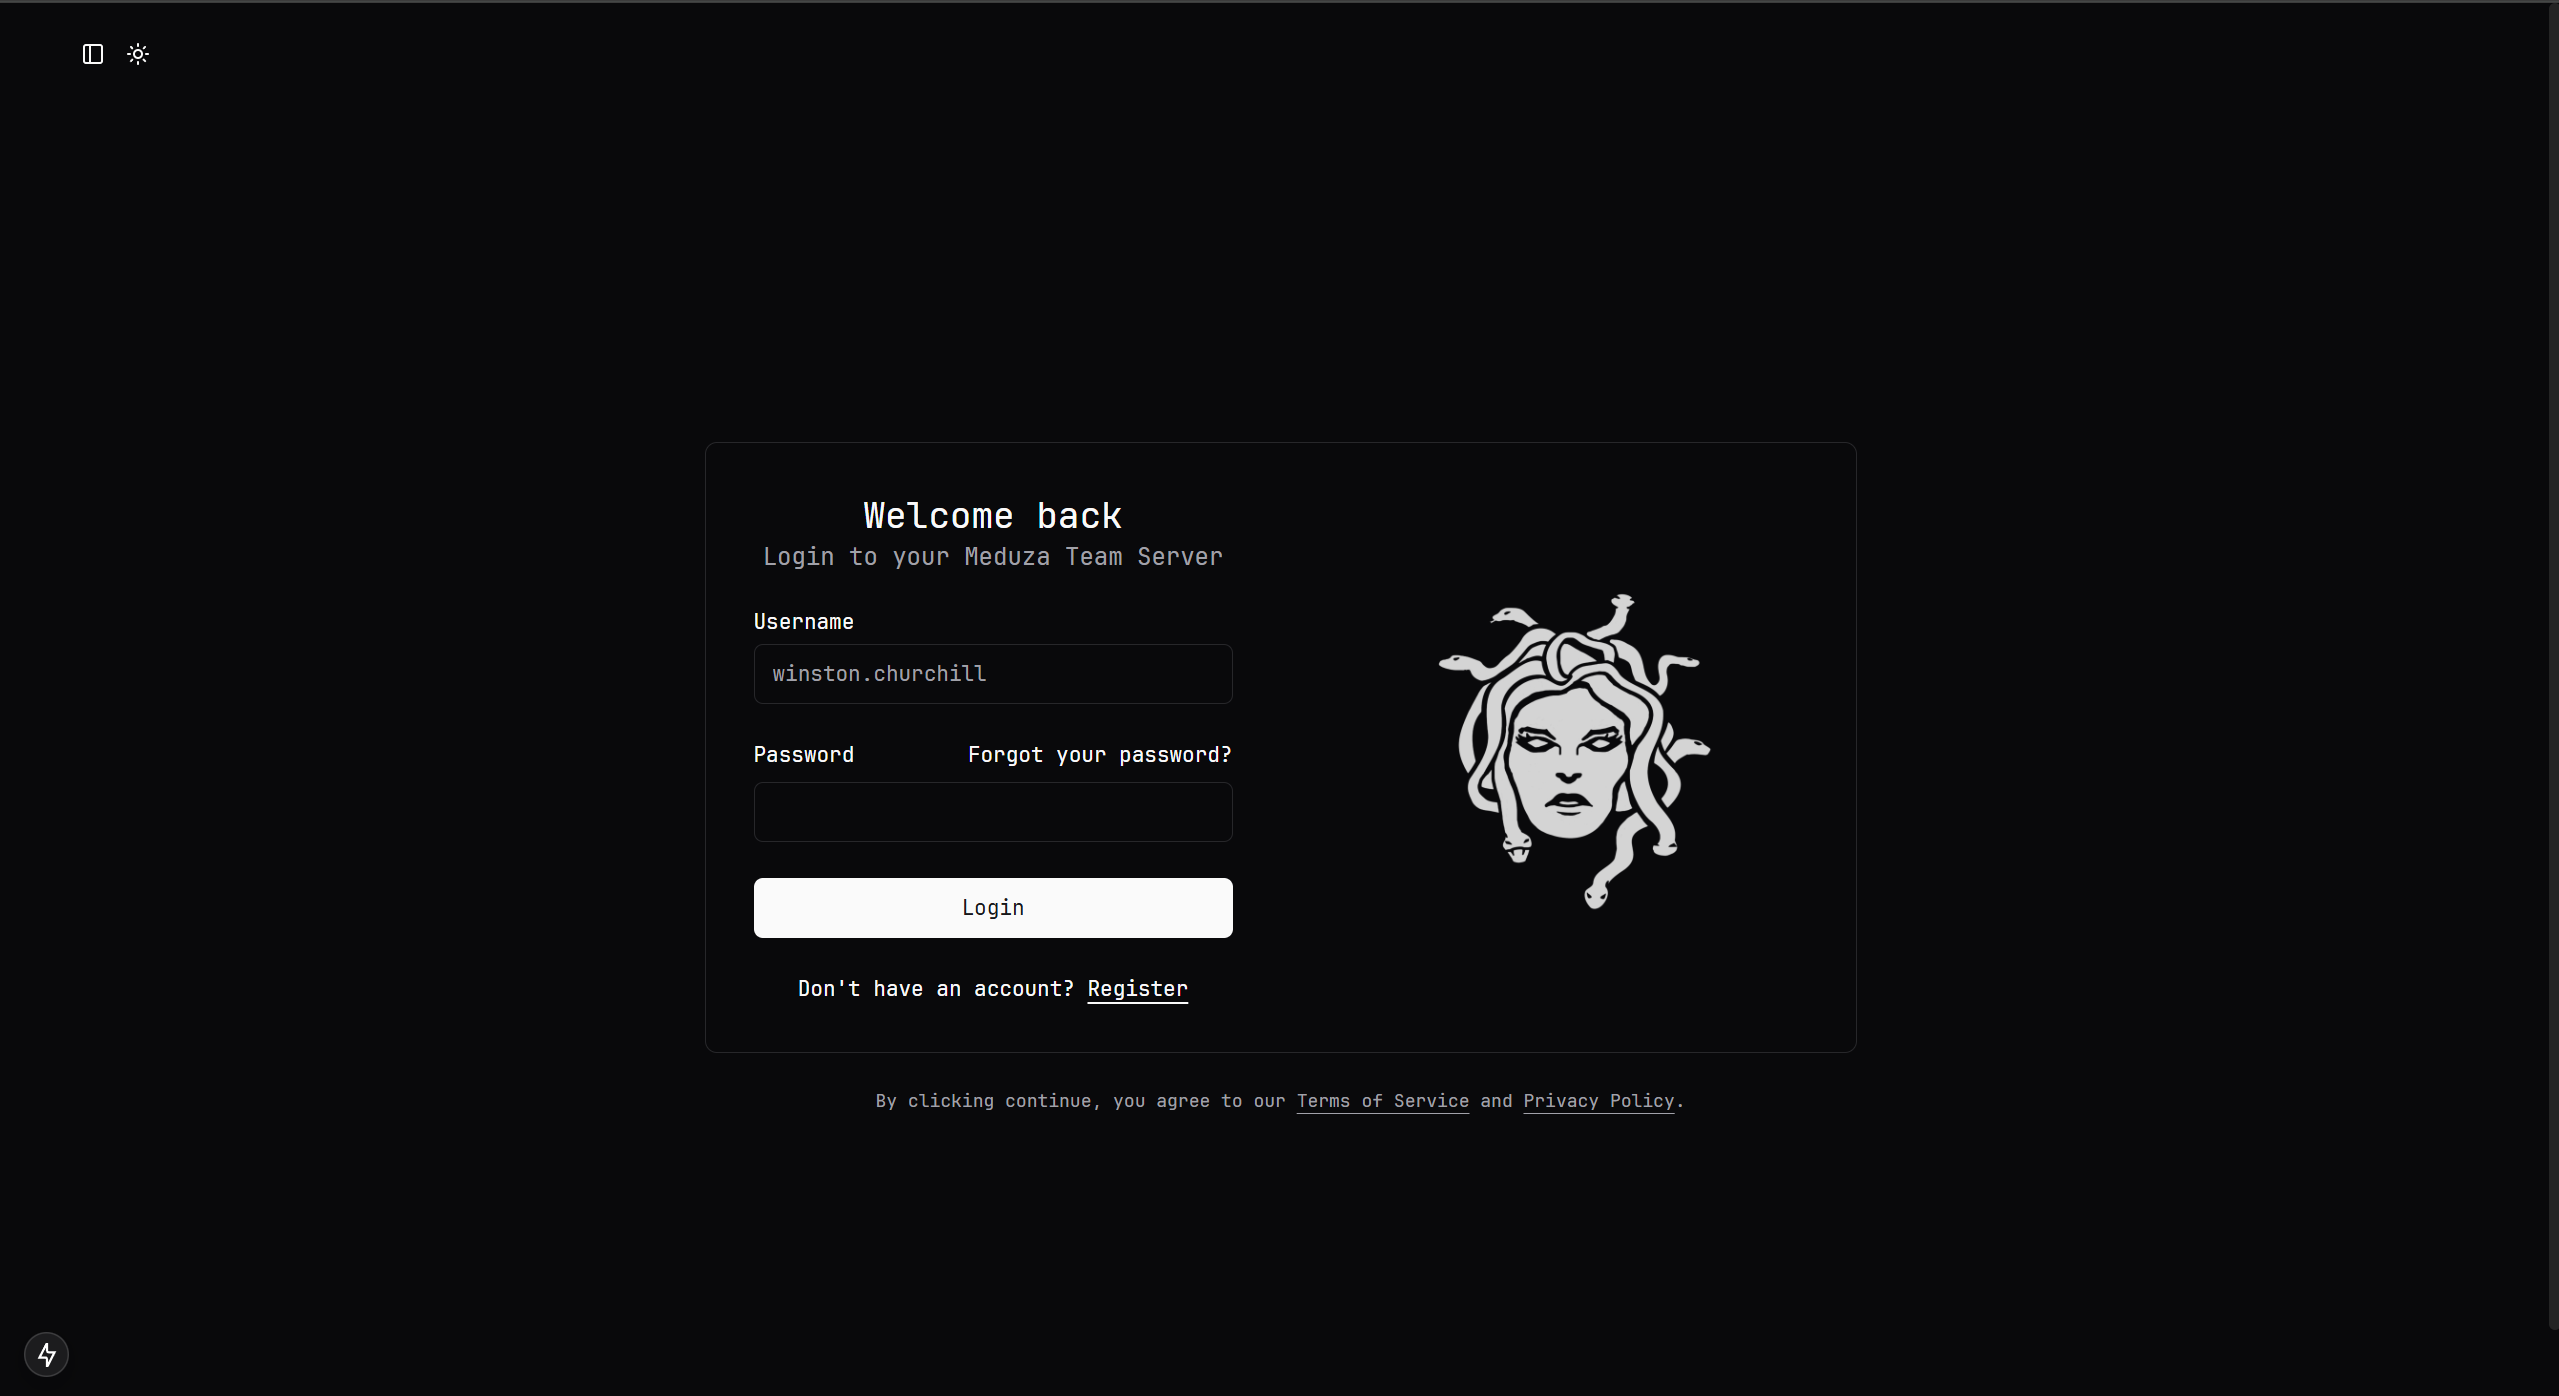
Starting a Listener
To start a listener, we first need to create it. Based on the listener type, we get different configuration options for listener-agent communication. In this case, v0.3 only supports HTTP listeners. However, the logic has been written for resolving other listener types and will be completed in the next version.
Below, I created an HTTP listener with a basic configuration: 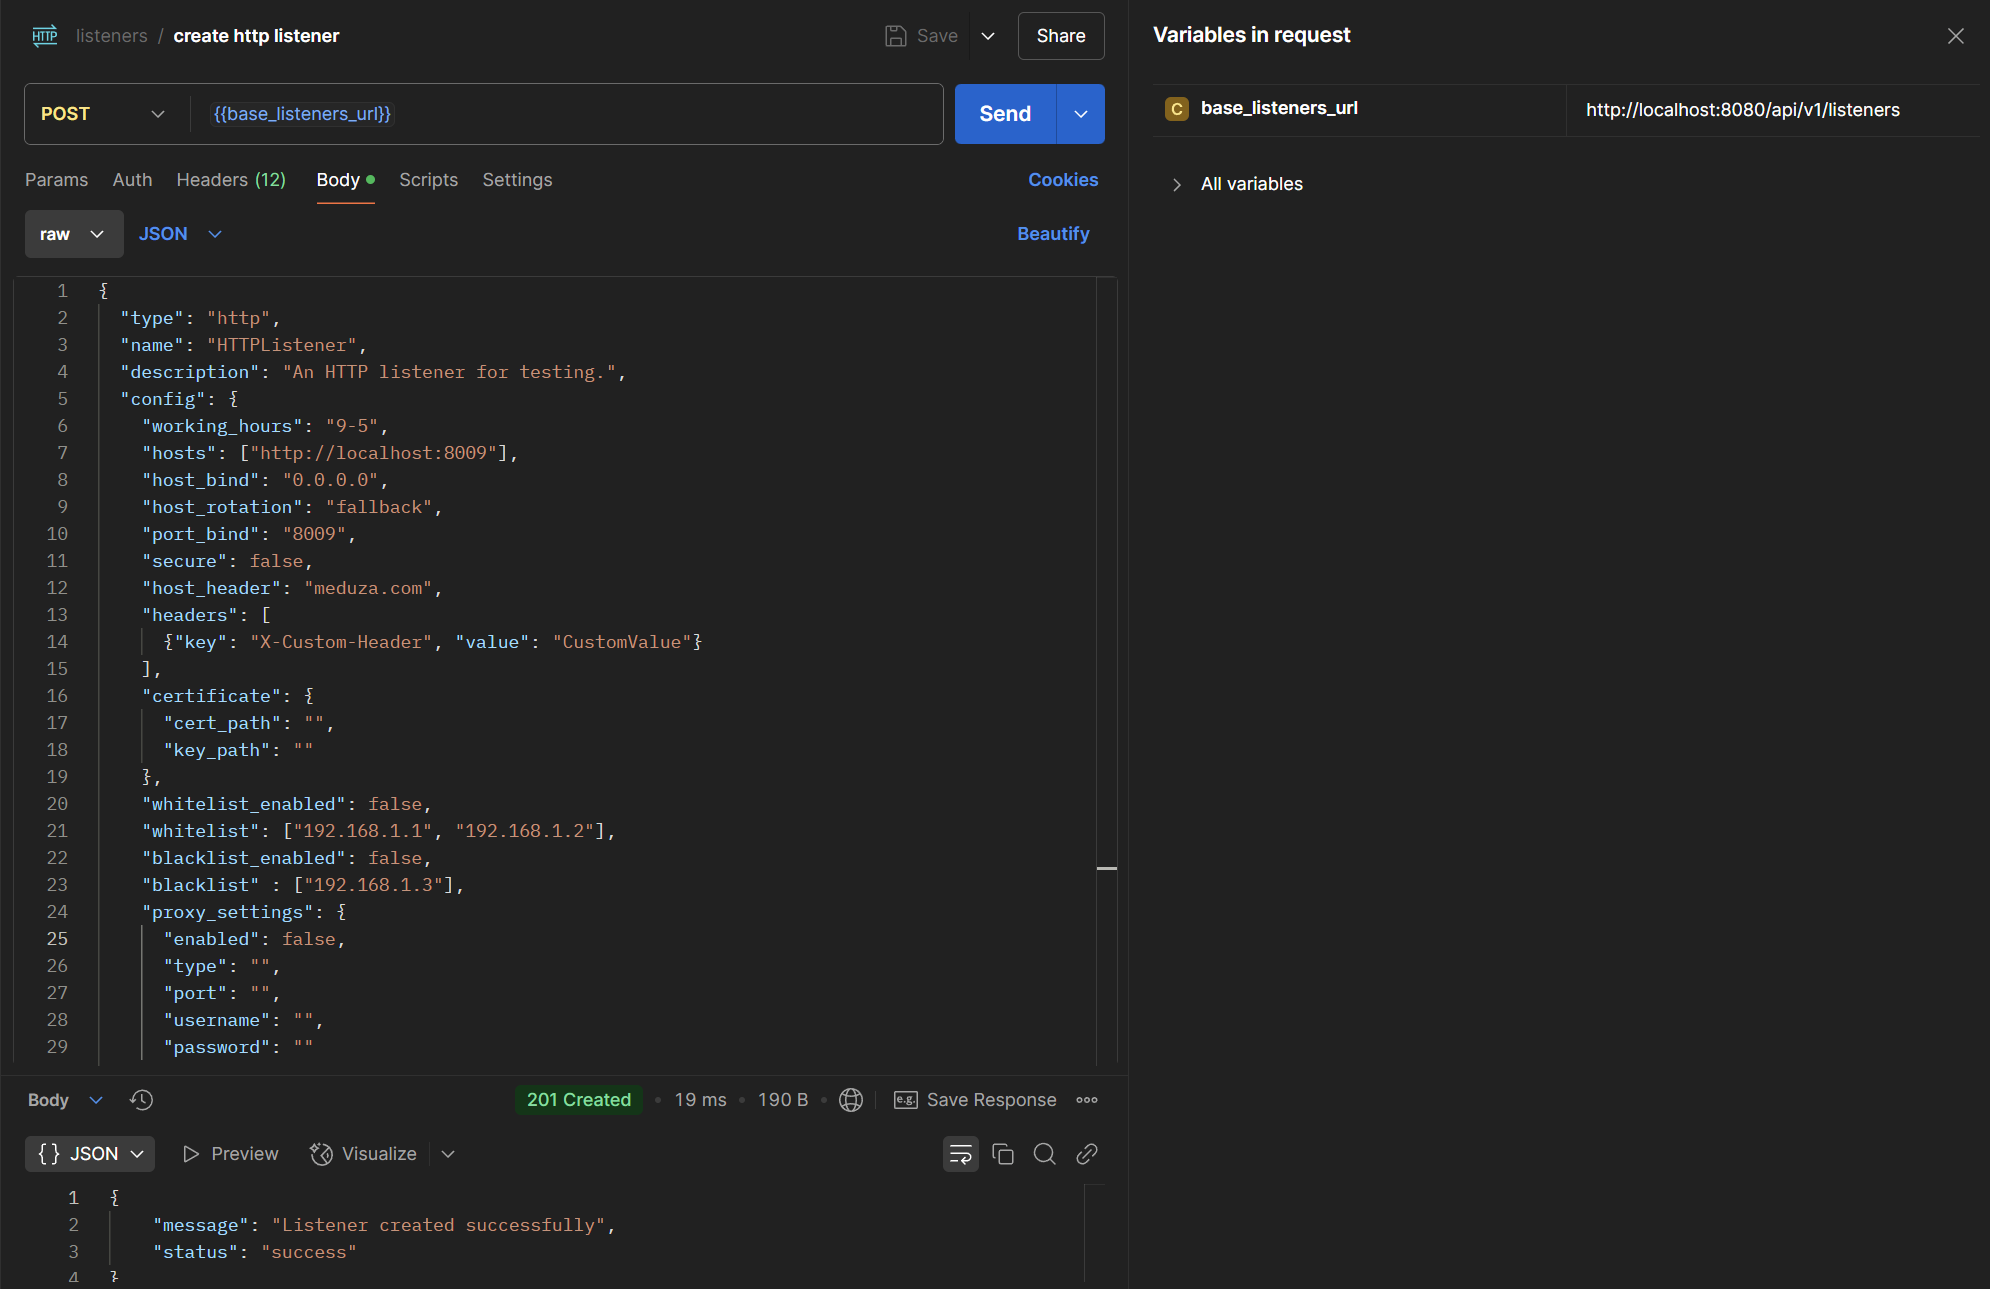
After creating the listener, we can get its ID and start it: 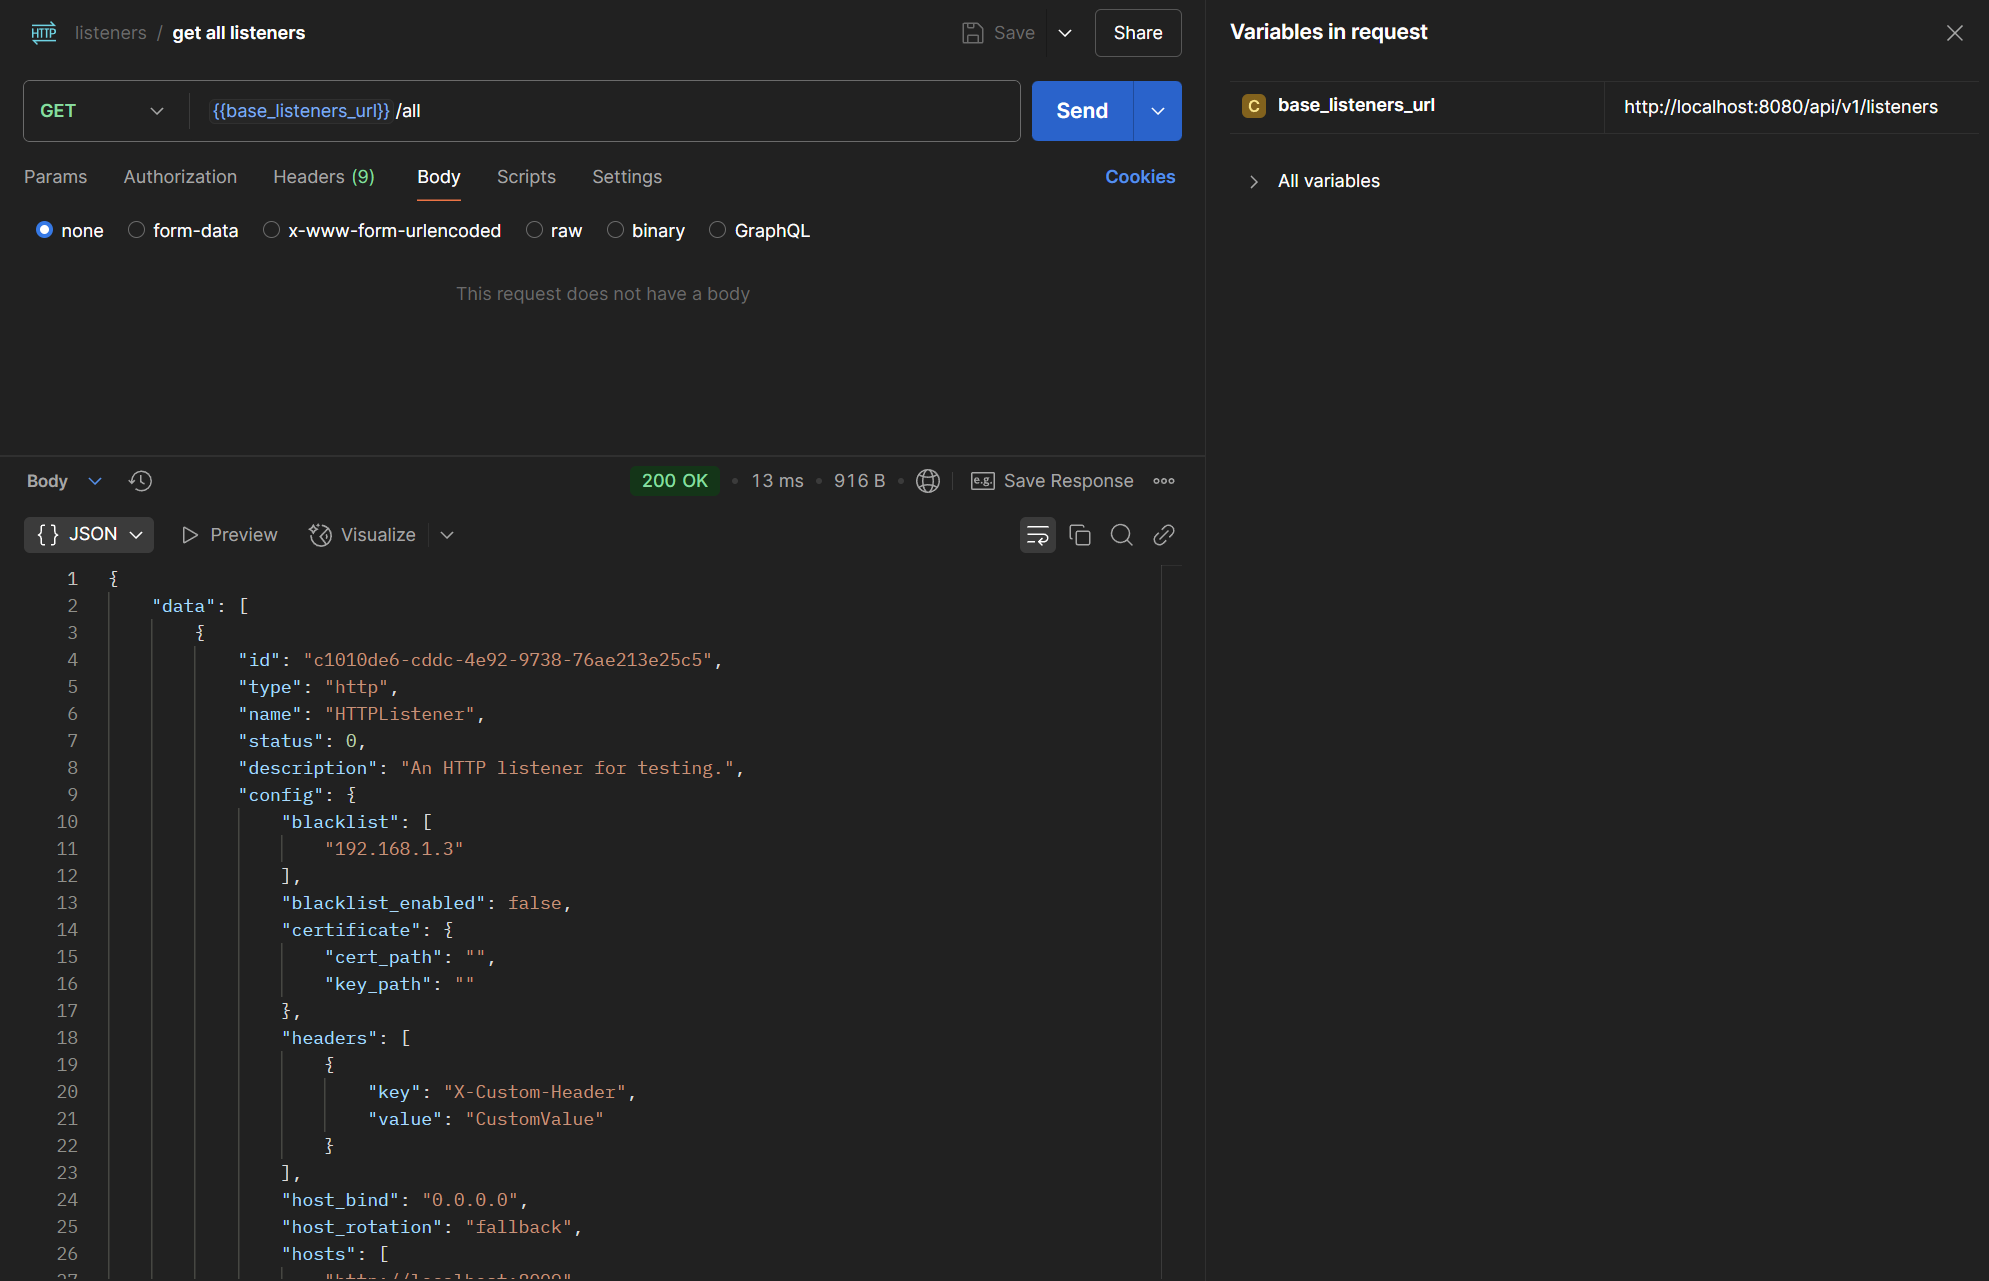
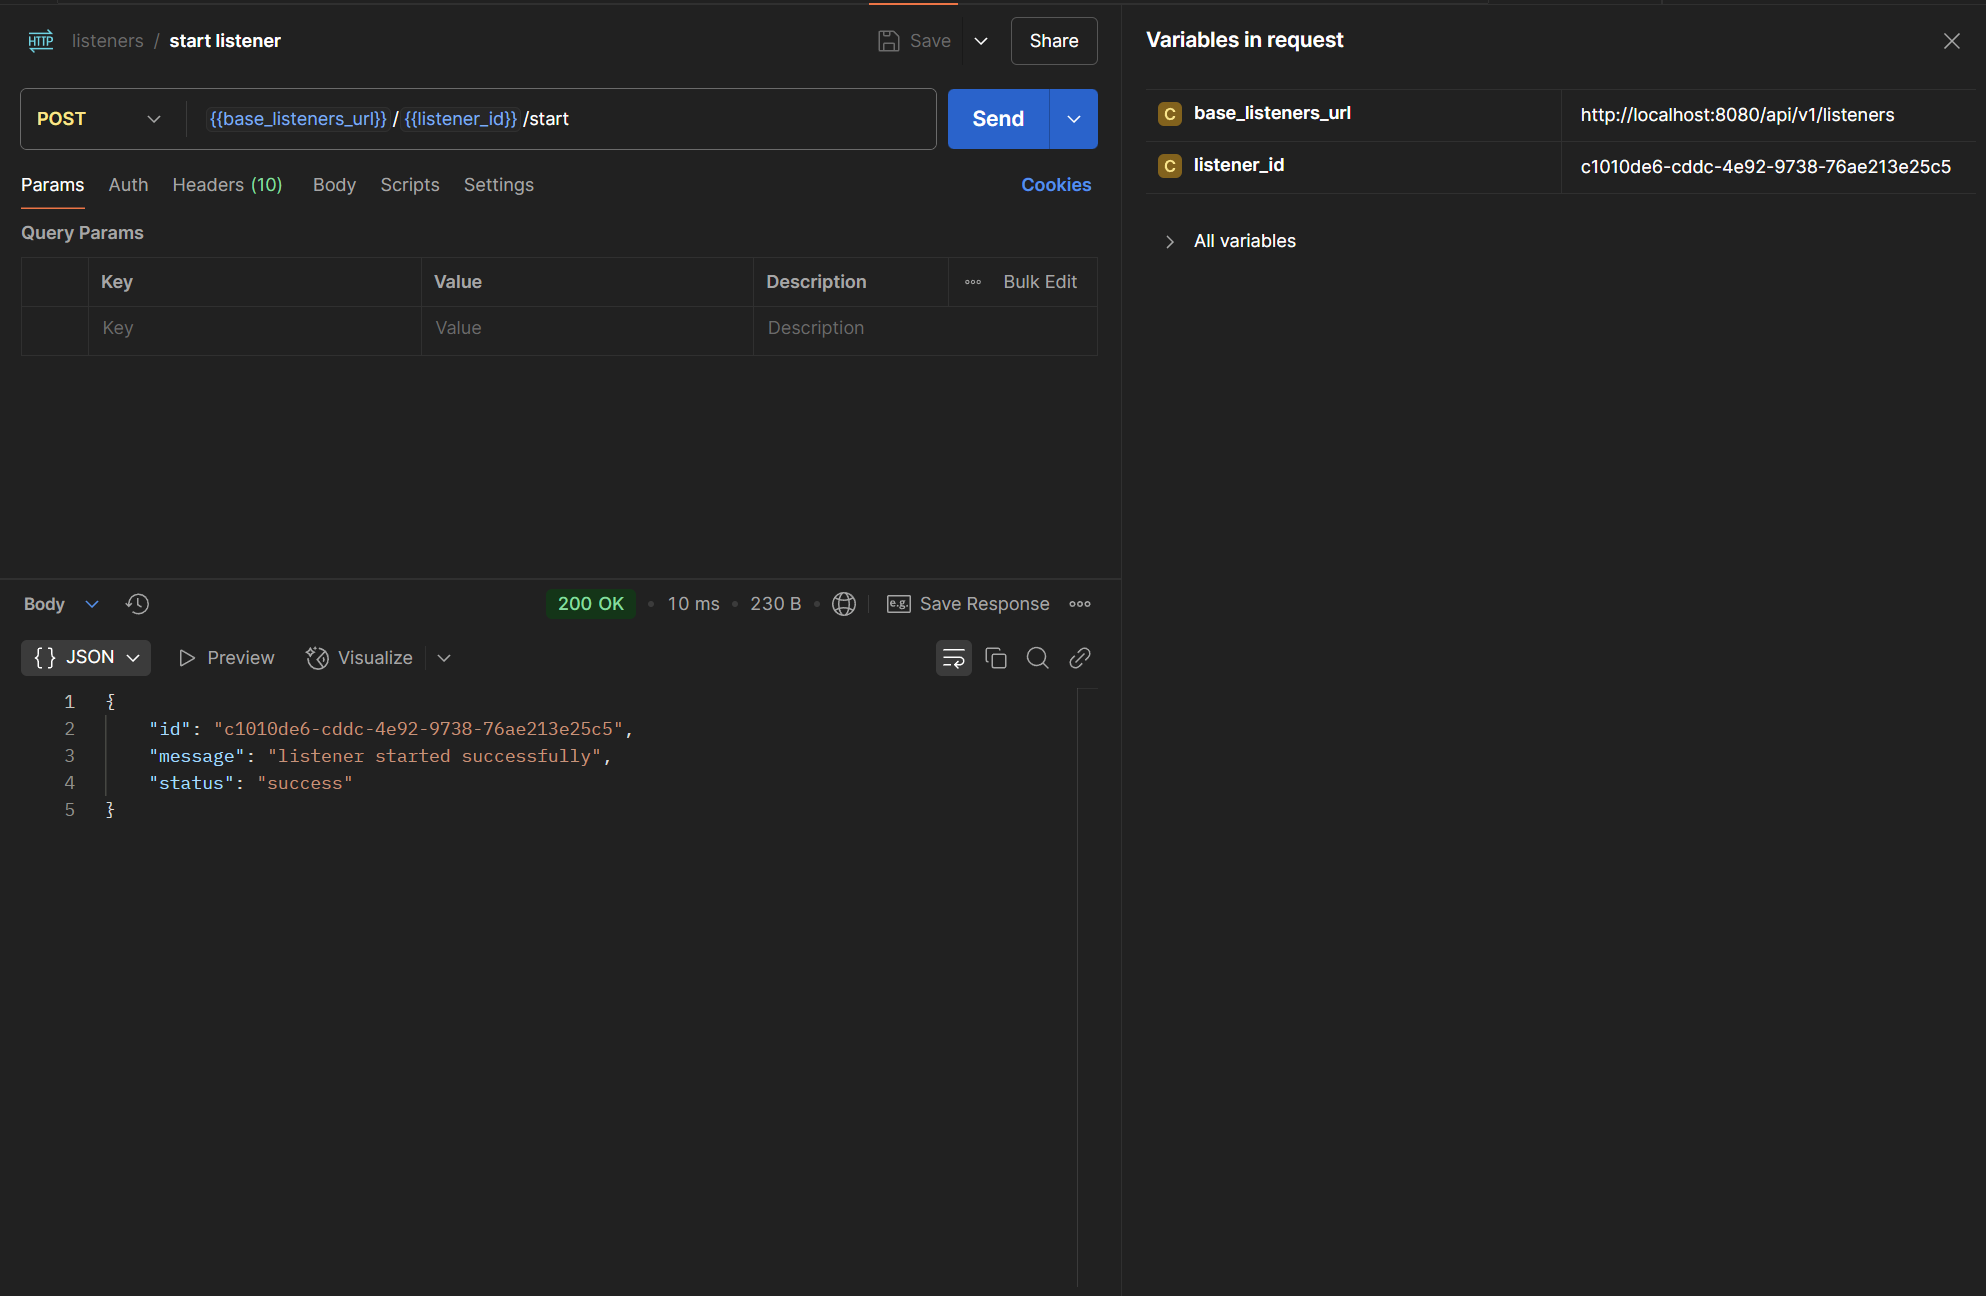
Which looks like this in the server log: 
Listener creation also works in the user interface in v0.3: 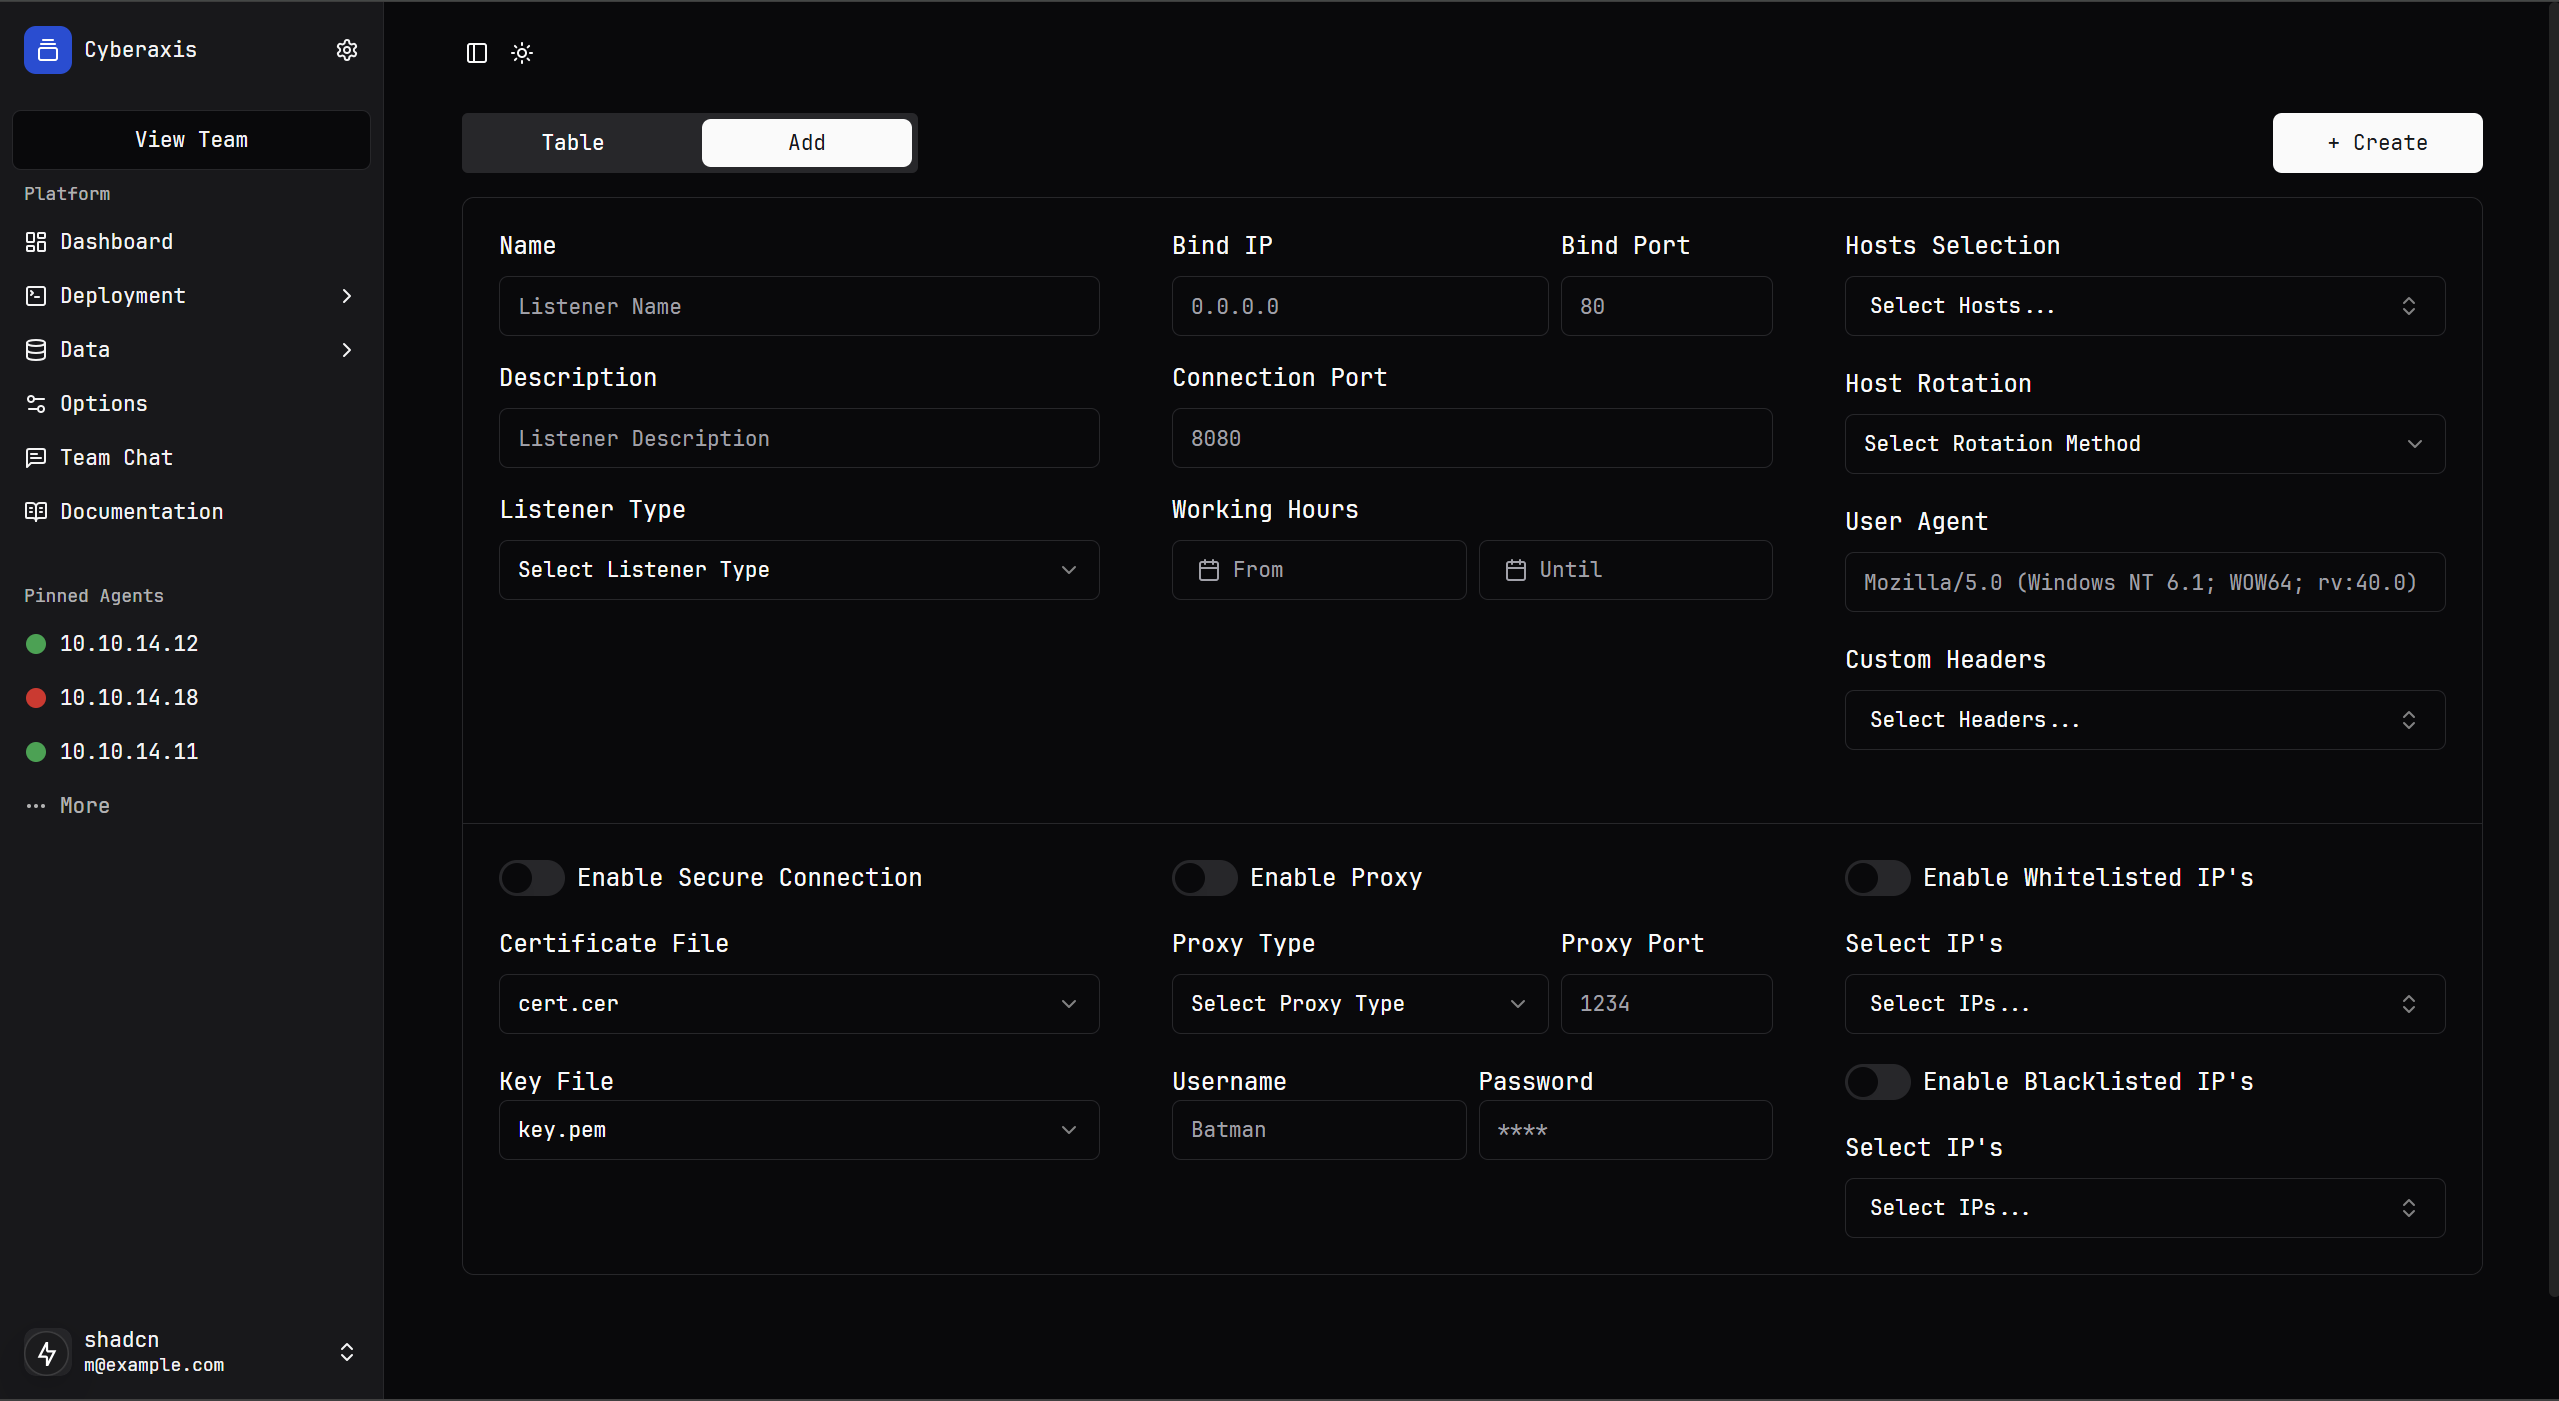
Running Shell Commands
Once an agent is created and registered, we can start running commands (sending tasks to the agent). There are several command types to choose from. The most basic one is the shell command, which executes a command in the cmd using the /c prepend.
Here we will run a list directory command: 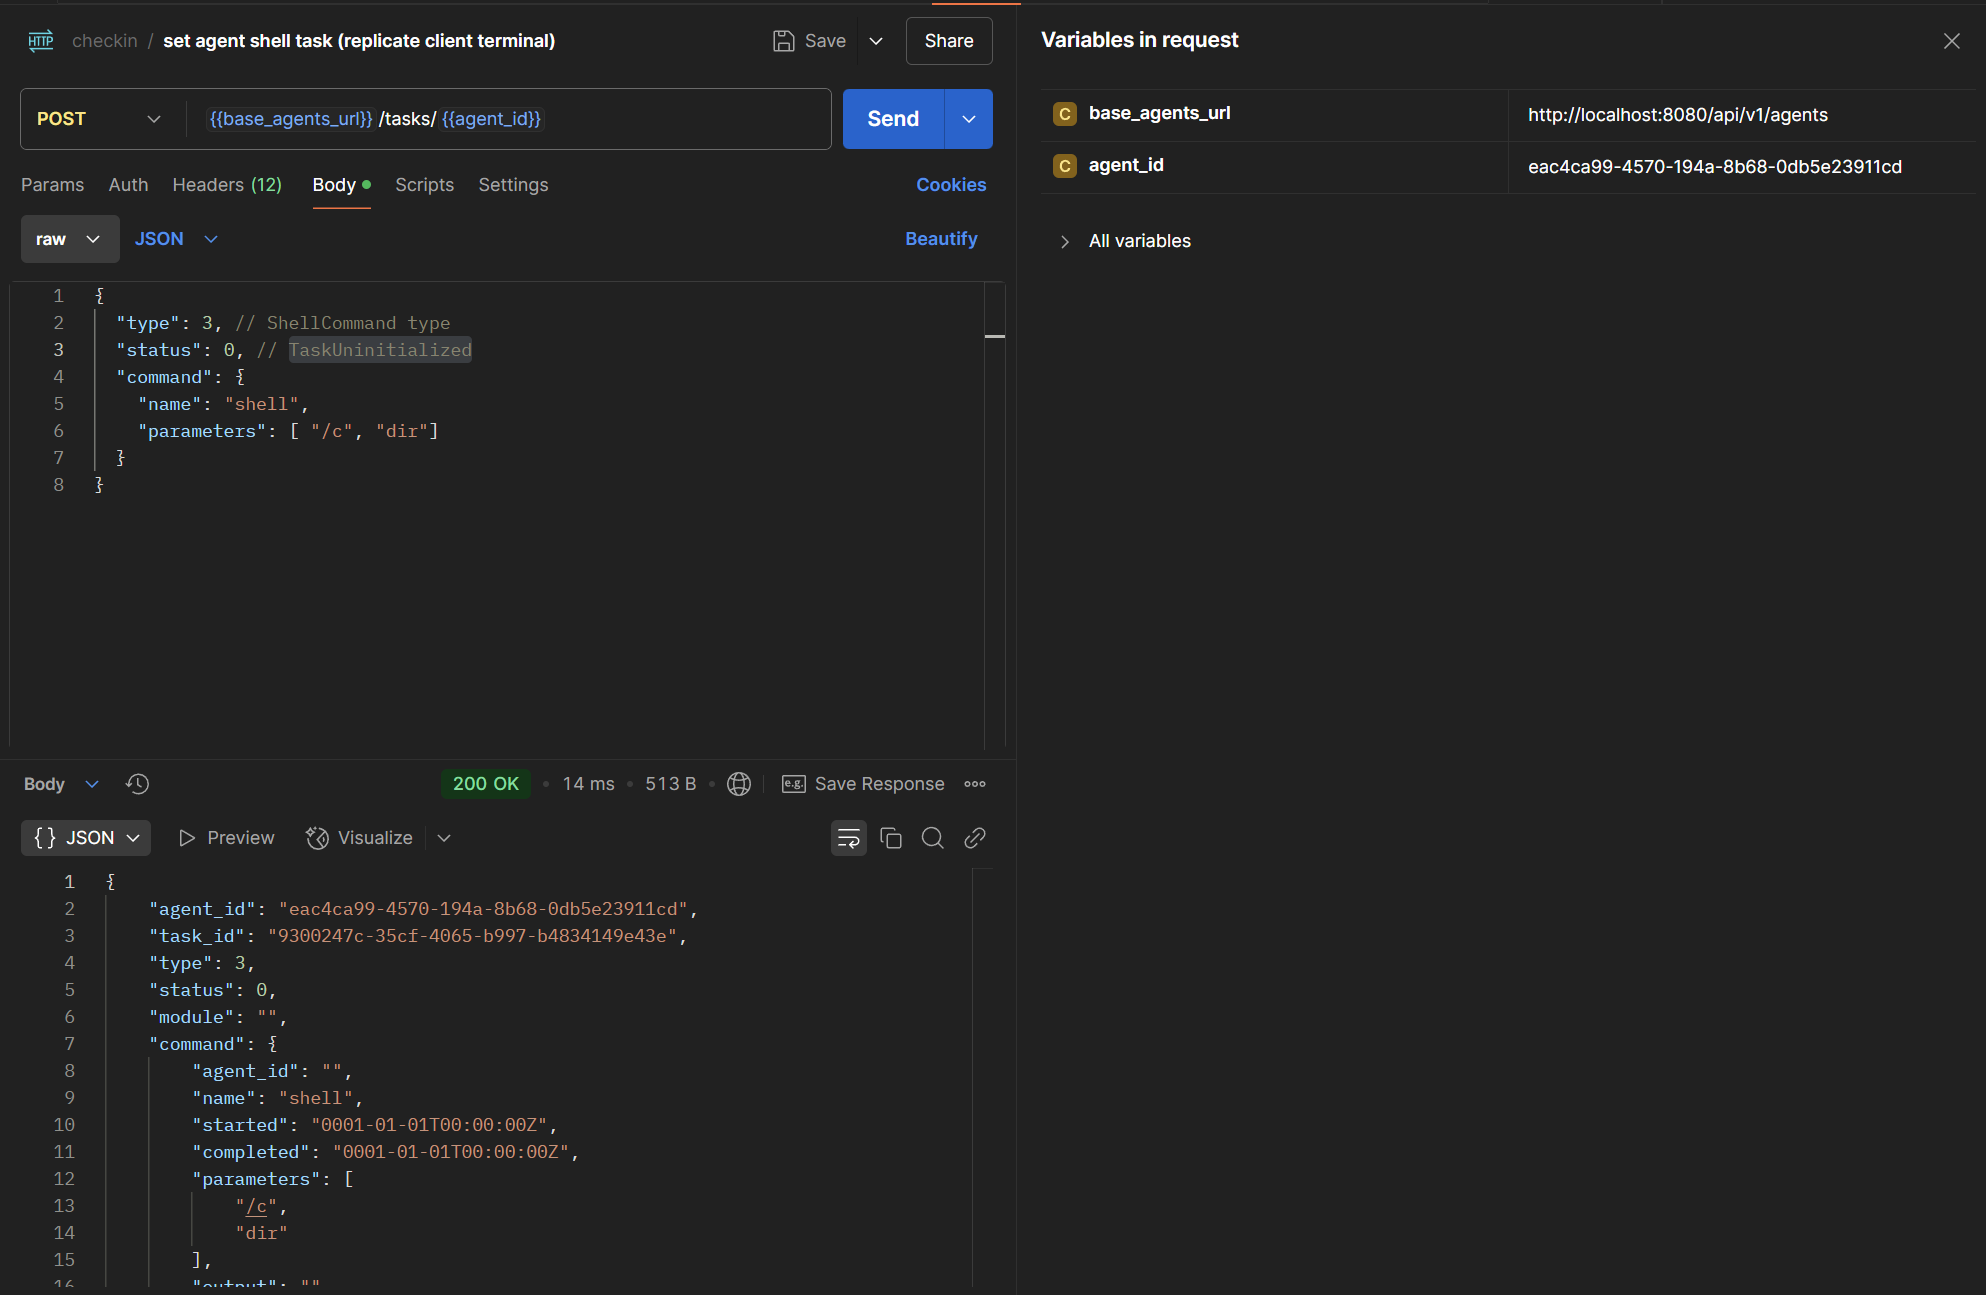
Uploading Modules
One of the main goals of the project is modularity. Once a module is developed, it can be packaged and released on GitHub. We will be using the following example: Meduza.ListDirectory.
Once we have installed the release of the module, we can upload the .zip to the server: 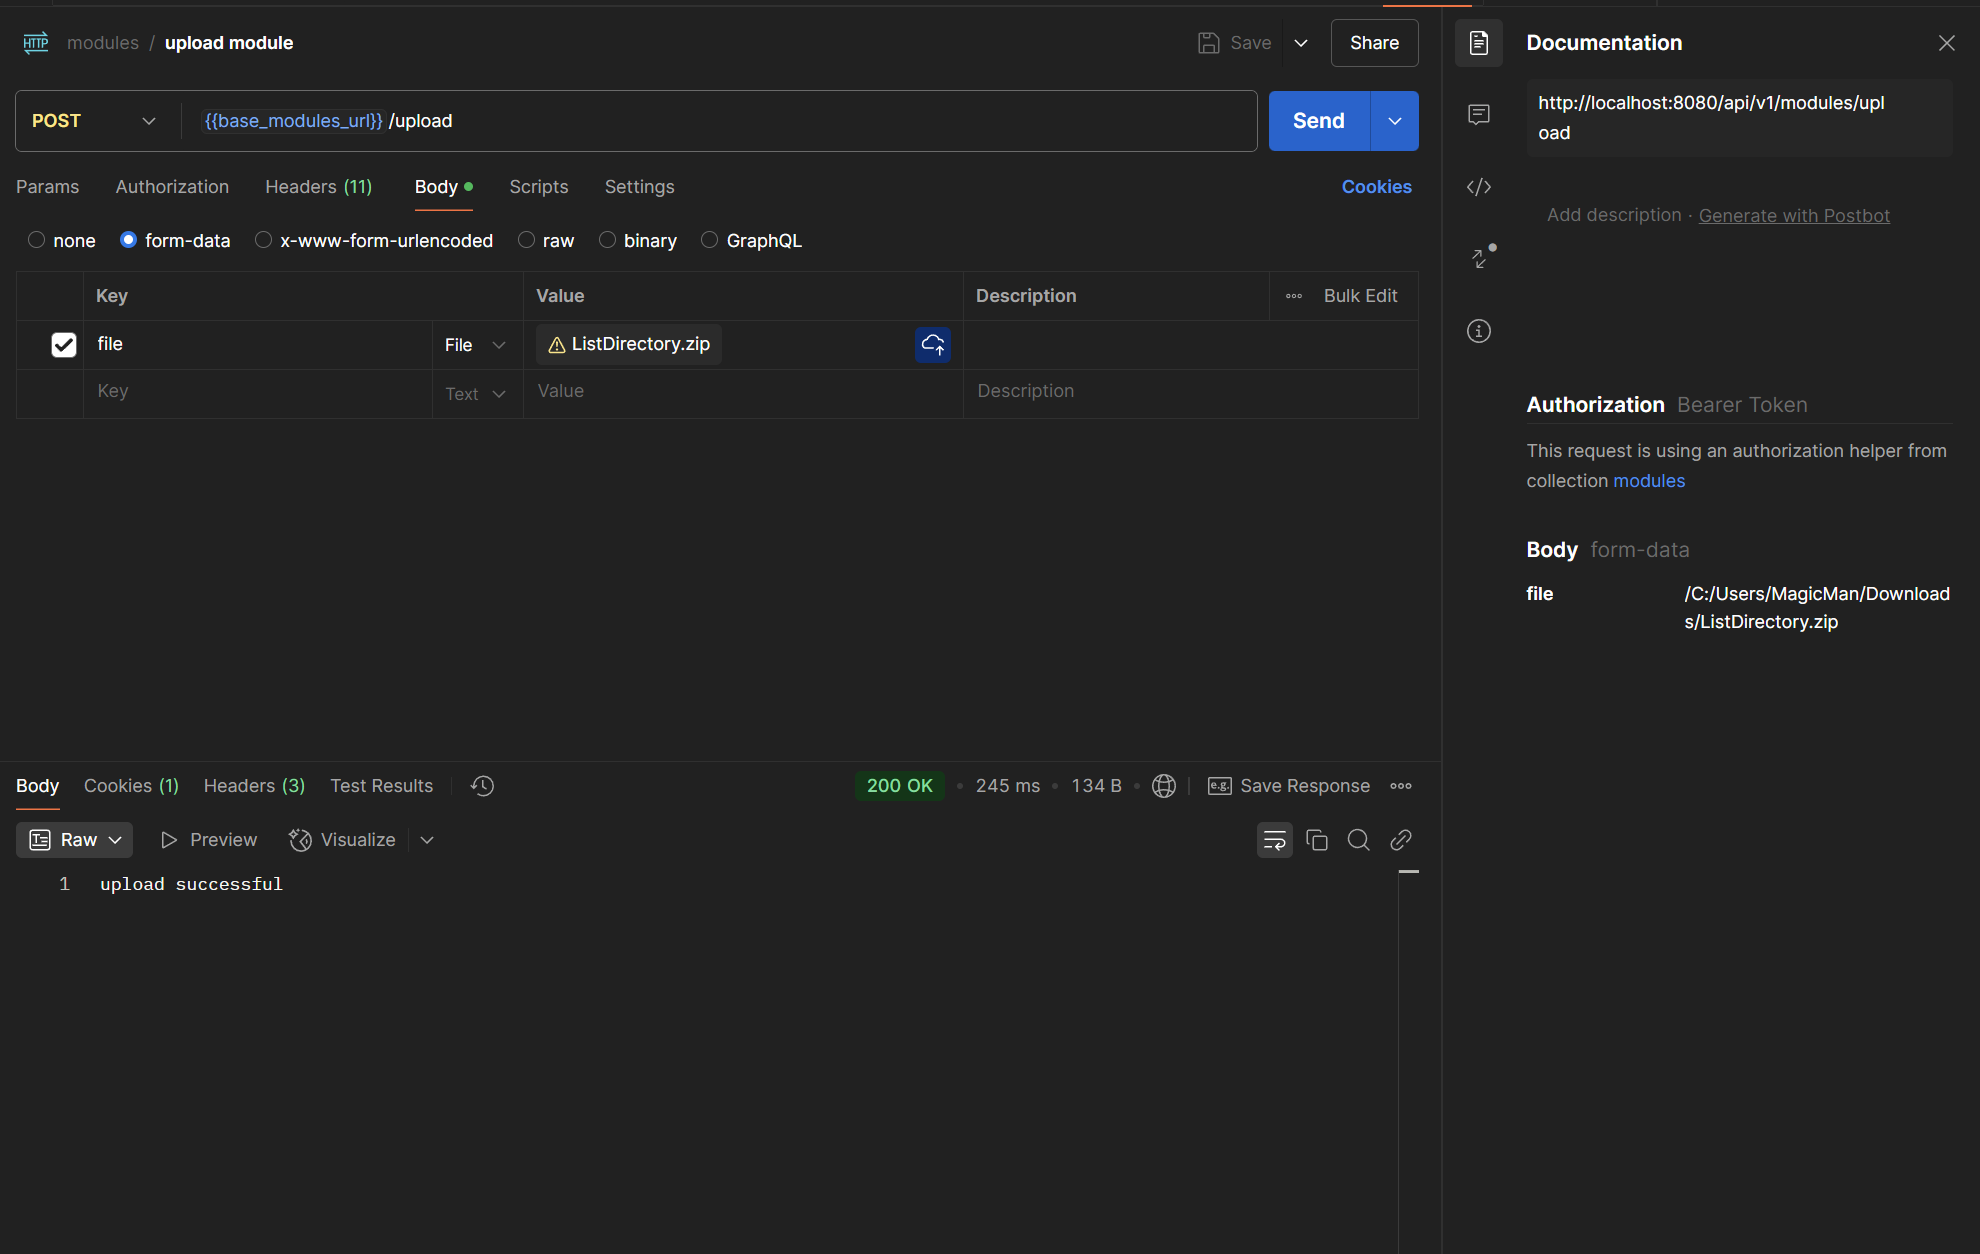
The module will be extracted and saved on the teamserver under /modules/*: 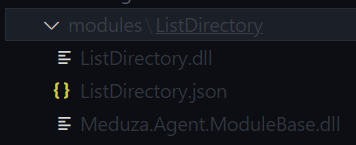
Running Module Commands
After a module is uploaded, we can utilize the commands that come with it. Commands can be listed using a help command in the terminal (which isn’t functional yet in v0.3). In the future, the ModuleName.json file will be enumerated, and the usage, as well as other module metadata, will be easily accessible on the teamserver.
Below, we will use the ListDirectory module command from the Meduza.ListDirectory module: 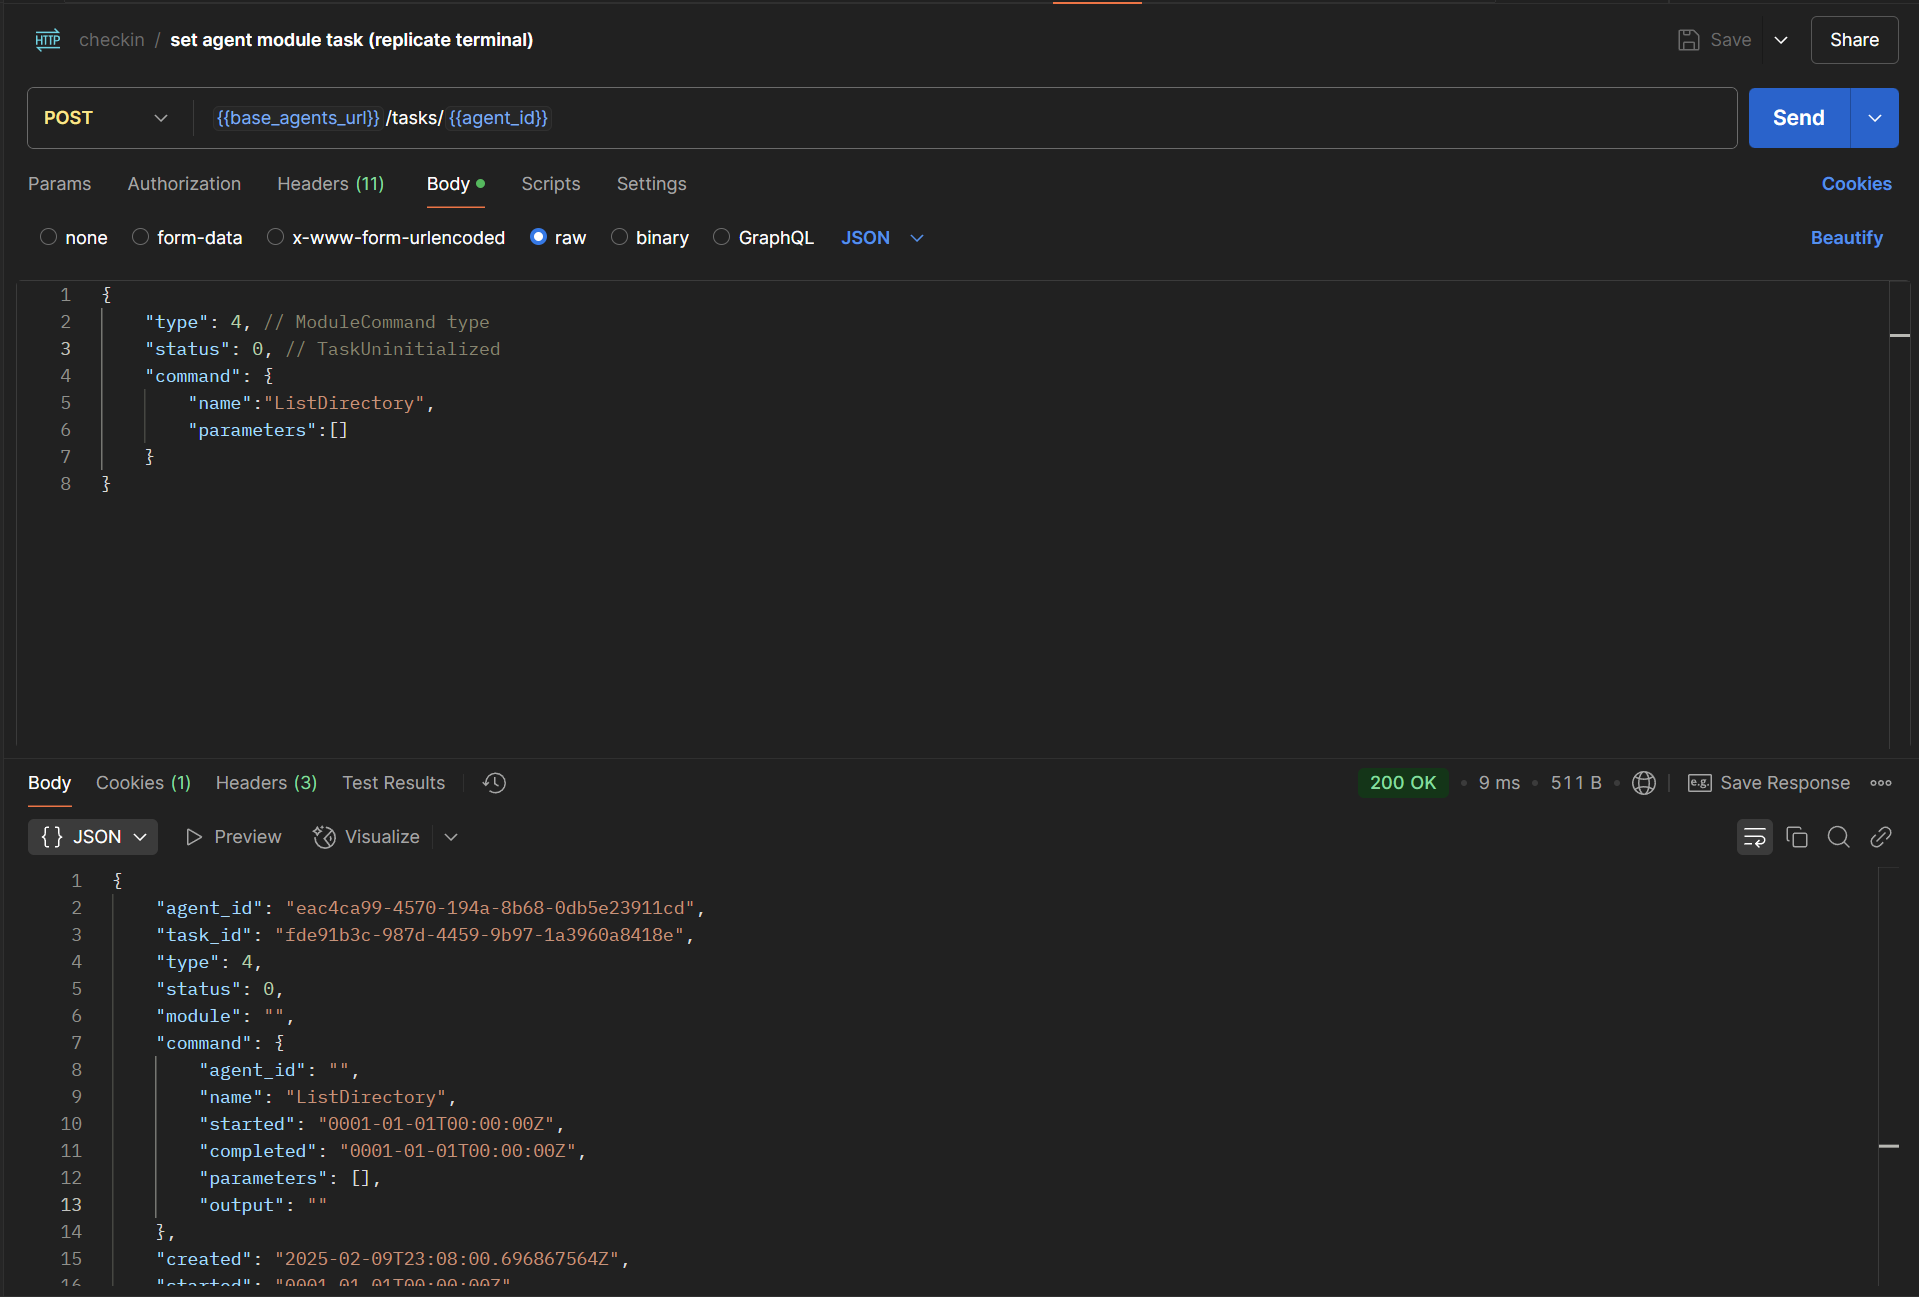
Command Output
Once a command is executed, the agent will contact the server with the command output. Below, we can see the output of both commands that we ran prior, using pgadmin: 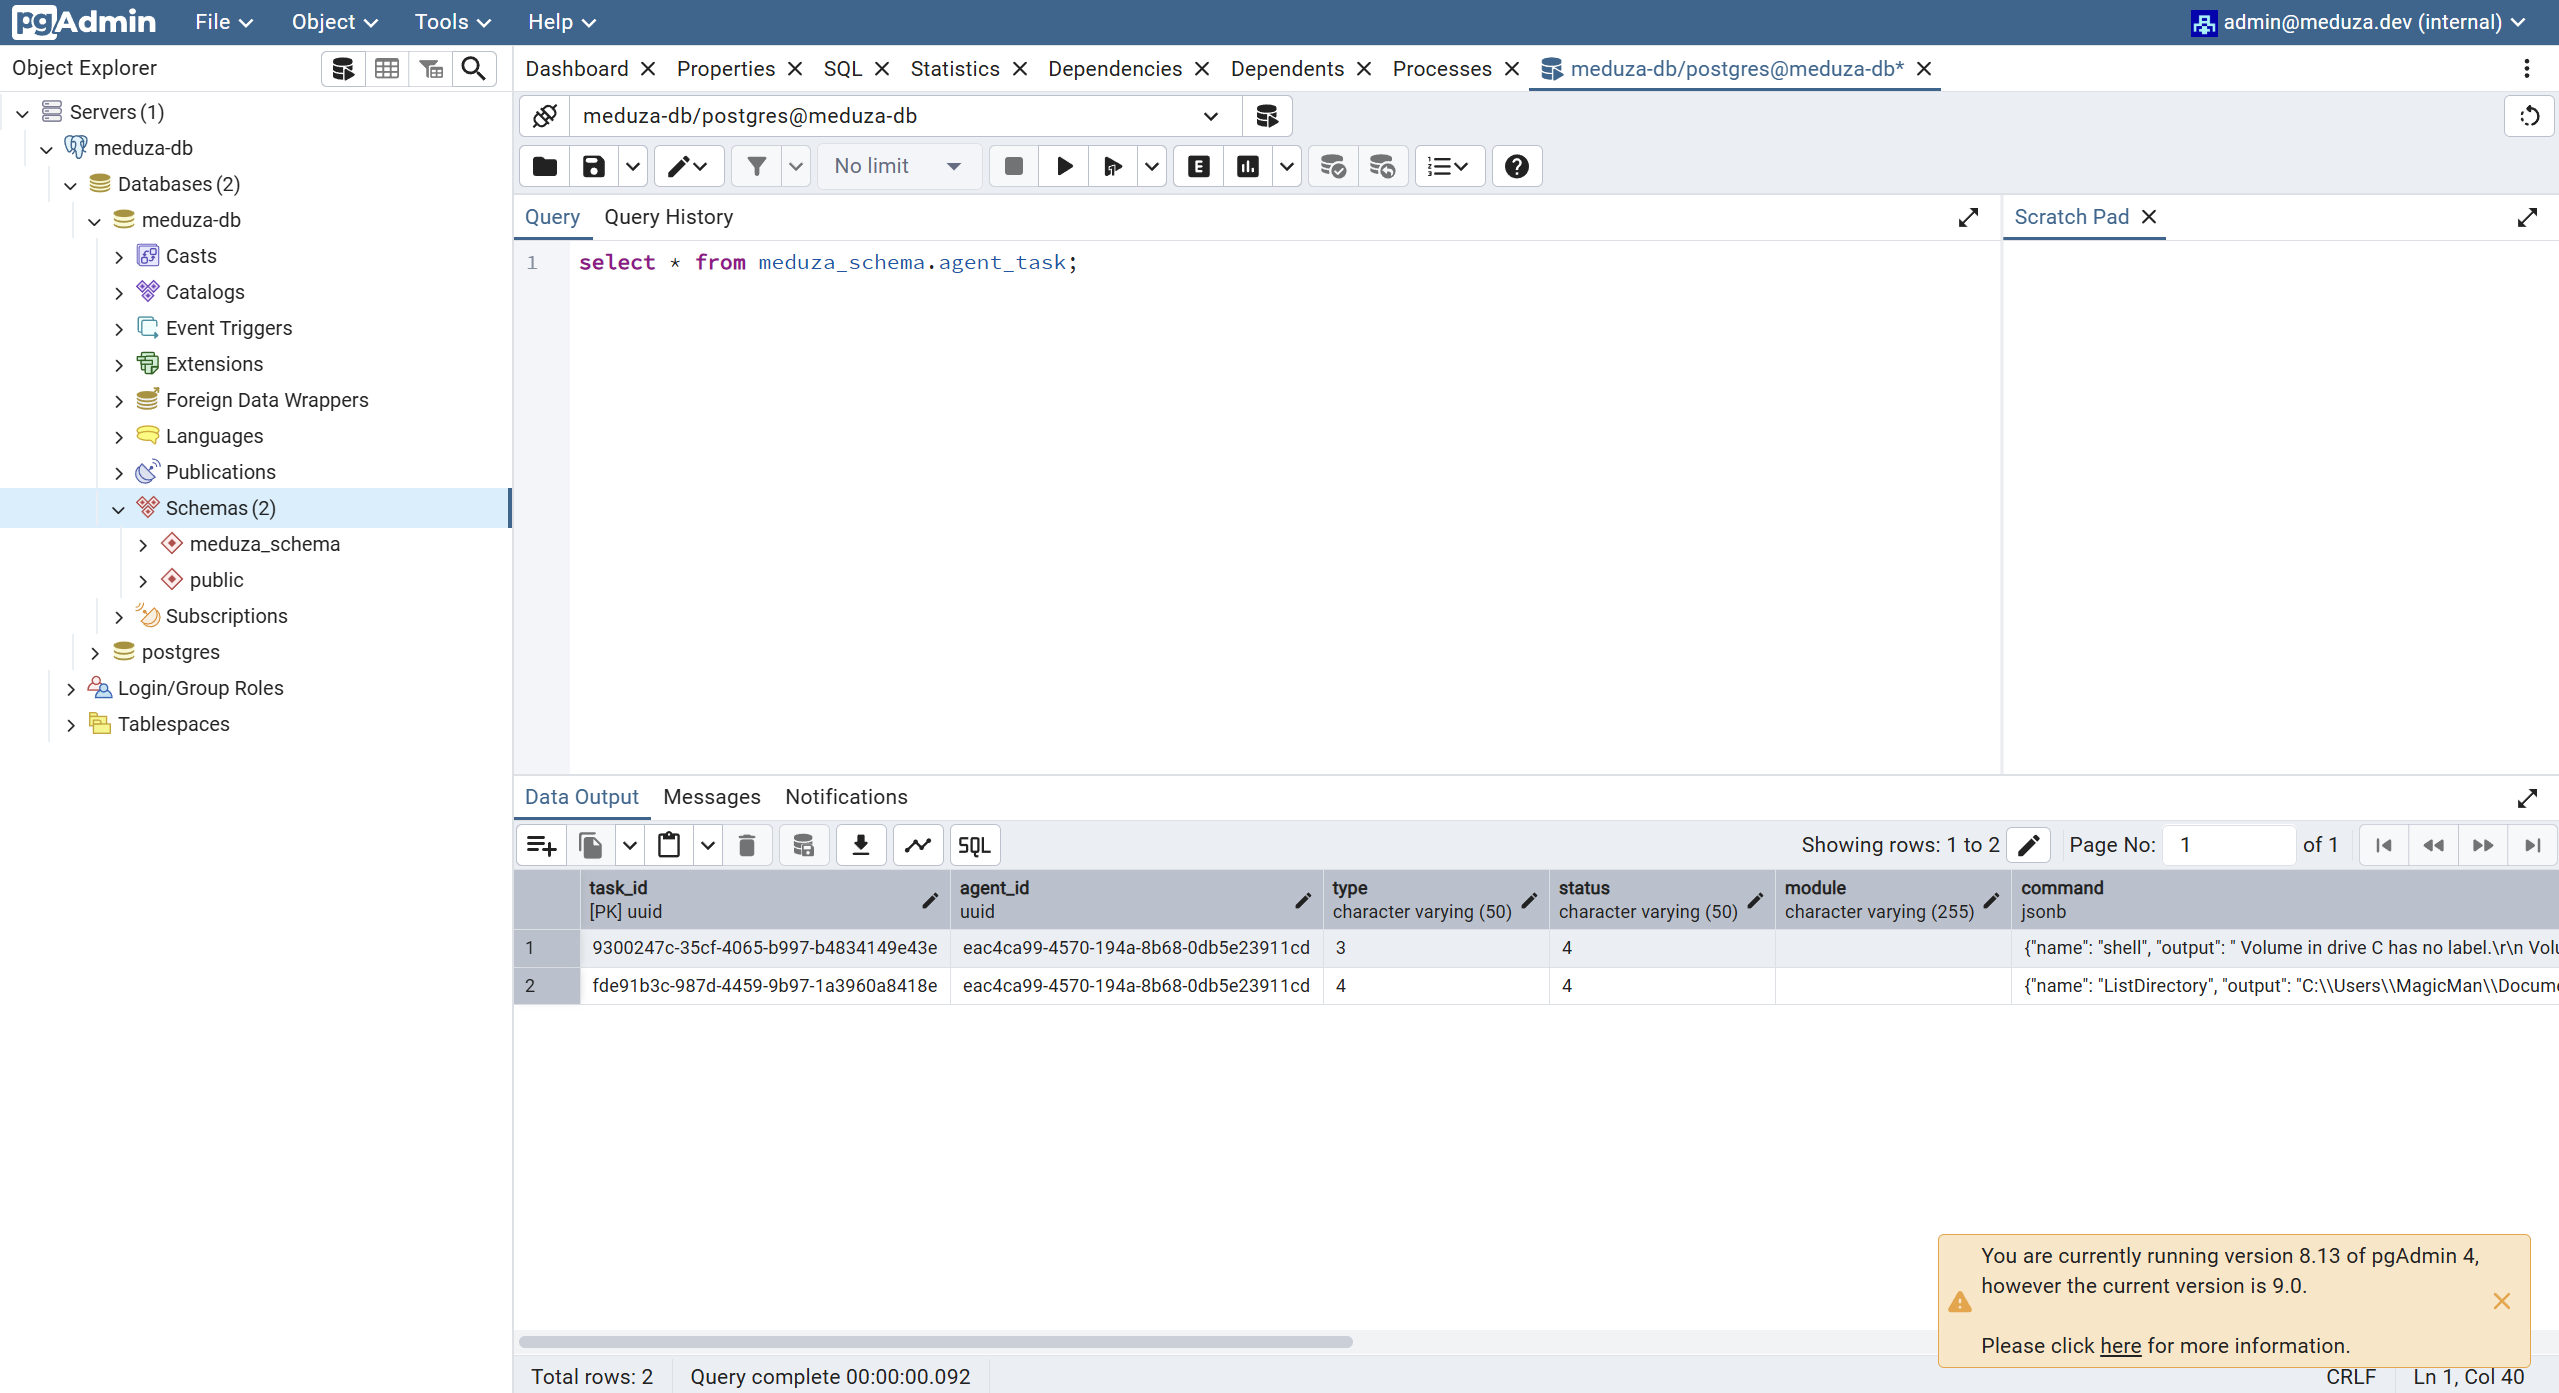
User Interface for the terminal: 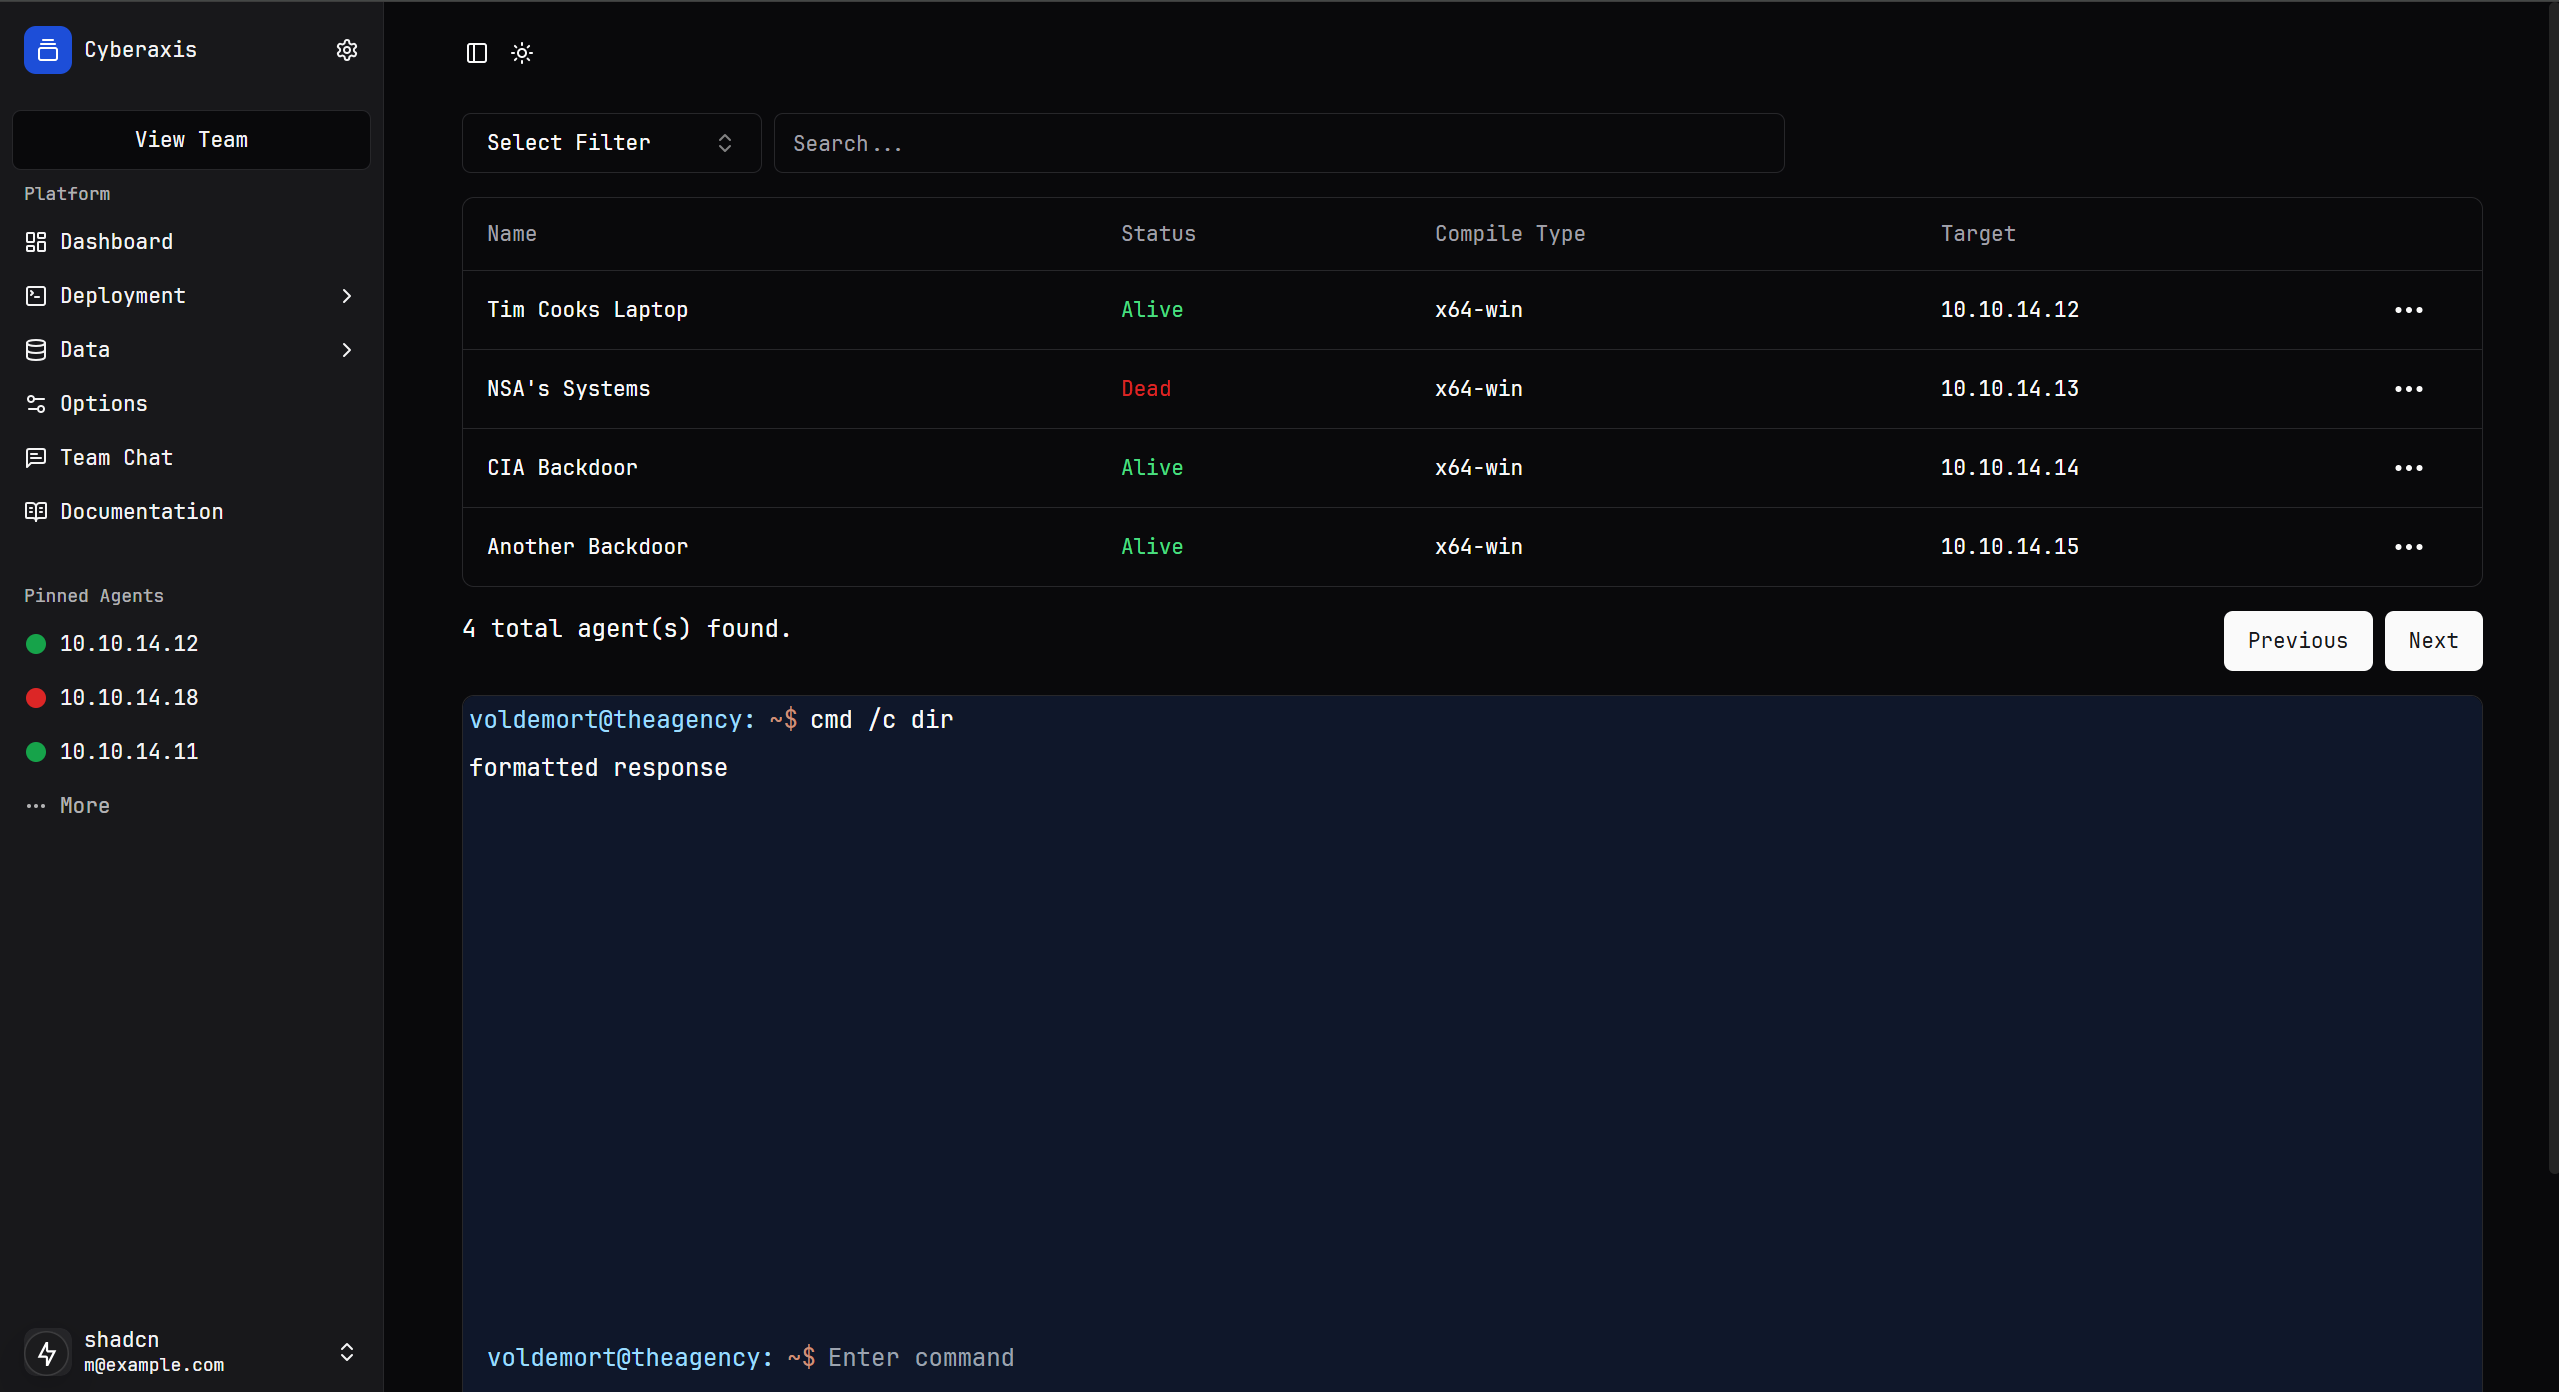
Module Development
Module Base
Modules utilize the ModuleBase NuGet package to easily create and release modules for the Meduza framework. The Module Base allows the agent to load any external assemblies that integrate the interfaces that are provided.
ListDirectory Module
The project referenced earlier, Meduza.ListDirectory, is an example of how a module can be developed, packaged, and deployed.